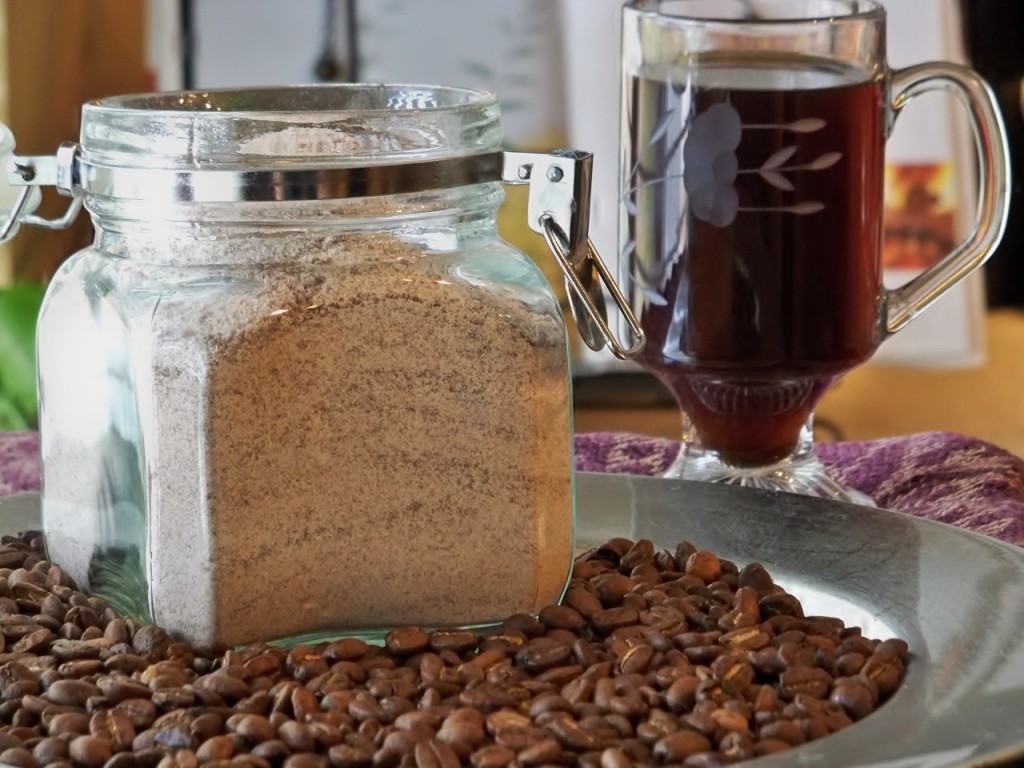
DIY: Cafe Vienna Powdered Coffee Mix

Do you remember when those little red tins of Cafe Vienna coffee mixes first came out years ago and everyone used them? I have to admit I loved the stuff! My mother in law and husband first introduced me to it and after a while my hubby and I concocted the perfect cup of coffee with it. We’d brew a beautiful cup of coffee with fresh ground beans and add a heavy teaspoon or so of the Cafe Vienna powder and a splash of regular coffee creamer and it was perfect! Then they were bought out by another company and the formula totally changed. Not to mention, at 4 bucks a can they were getting a little pricey for a daily indulgence. Both of these issues urged me to find another way to enjoy my treat for pennies on the dollar and one that tasted how I preferred it. I found a recipe similar to this one in a newspaper a few years ago and have since adapted the recipe to reflect our personal tastes. This is by no means a coffee substitute but it works perfectly in place of your standard sugar for a delicious cup of coffee. It’s incredibly easy, all you do is toss the ingredients into a food processor and let it do all the work. I’ve been making this for about 5 years now, so long that I stopped measuring when I make it. I had to stop myself this weekend and remeasure everything just to share it with you.

Try this for a tasty addition to your coffee!

Cafe Vienna Powdered Coffee Mix

2 cups granulated sugar
2 cups plain non dairy powdered coffee creamer
1/2 cup (full) instant espresso granules ( I use Cafe Bustello Instant Espresso Coffee)
2 teaspoons ground cinnamon

1. Pour sugar in food processor and process for about 90 seconds. This will make the granulated sugar finer, but not as fine as powdered sugar (which doesn’t dissolve well in coffee- take it from me!)
2. With food processor off add powdered coffee creamer, instant espresso granules and ground cinnamon. Process 10-15 seconds to combine. Keep in airtight container.

Posted in General Announcements | 4 Comments

Menu: 12/11-12/17

Well it’s finally here! Finals week. Thank you Lord. Three weeks off from class and then I start my final semester of Culinary school. How exciting!
Oh and my hubby has lost 32 lbs! I am so proud of him! I made him rack of lamb when he reached his first goal of 25 lbs lost and froze the other half for his next goal of 30. So it looks like I’ll be making that this week. I haven’t lost that much but am chugging along to almost 20 lbs lost. Culinary school does not help one lose weight! haha. 🙂

Sunday: Reward meal! Rack of Lamb Provencal, Ratatouille and Potatoes Au Gratin.

Monday: Skillet Chicken BBQ Pasta

Tuesday: Skinny Chicken Tikki Masala and brown rice

Wednesday: Chicken Tortilla Soup

Thursday: Pork Chops with Mushrooms and Shallots, whole grain penne and salad

Friday: Working late in the kitchen

Saturday: Catering Event

Posted in Menu Plan Suggestions | 3 Comments

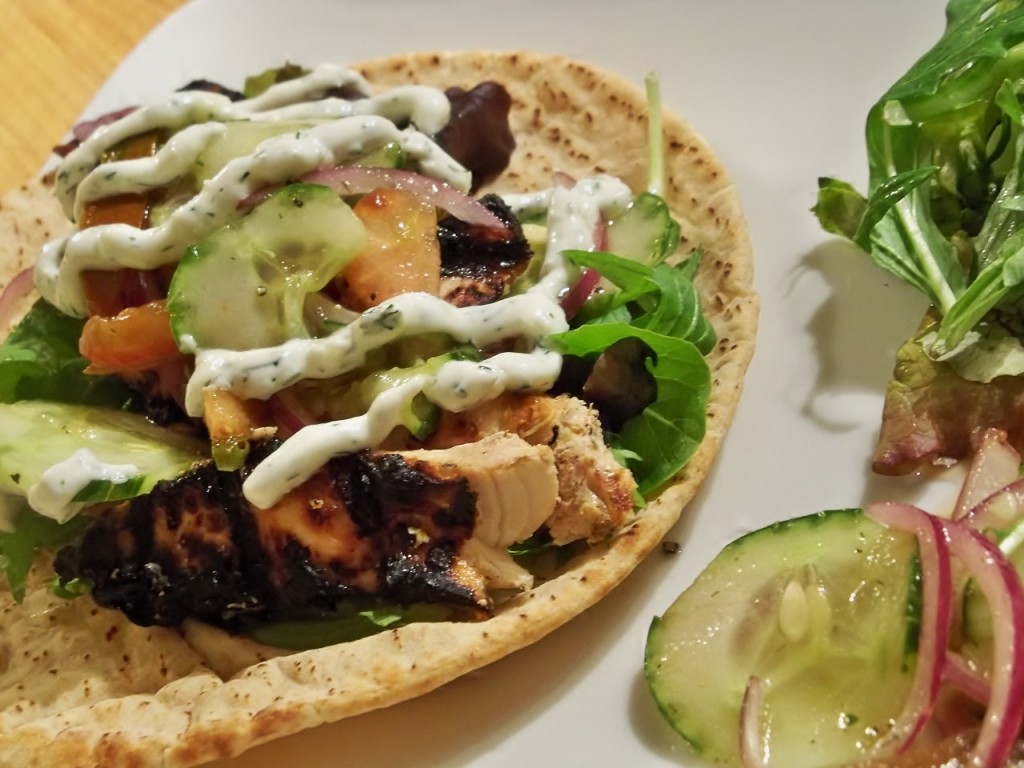
Chicken Shawarma

My husband and I could not stop praising this dish when we were eating it. As soon as the chicken hit the grill, the aroma was absolutely intoxicating. You could easily make this dish on a grill pan or in a regular skillet. Don’t let the cold weather stop you from making it!
I was skeptical of adding cinnamon and cloves to the marinade for the chicken but in the interest of trying to stick to the recipe and to the ethnic heritage of the food, I did. Holy cow. I am so glad I did! The sweet/savory/tangy/crunchy combination of this dish is to die for! I got so excited about blogging this recipe that as soon I finished dinner I ran to my laptop to start writing. Good recipes must be shared with the world!
I followed the marinade recipe to a T but tweaked the garnish of cucumber and tomato and turned it into a cucumber, tomato and red onion salad to top the shawarma. So perfect! It’s tasty and fit in our 500 calorie or less dinner plan, coming in at 200 calories per sandwich.
Oh and a neat little tid-bit for you. This shawarma only costs about $2.00 a serving, I can guarantee that you wouldn’t pay that at any Indian Restaurant in my neighborhood.

Chicken Shawarma with Cucumber, Tomato and Onion Salad
Slightly modified from: Budget Bytes
Makes 6 Sandwiches

1.25 lbs chicken breasts
1/2 cup plain yogurt (I used Fat Free Greek Yogurt)
1 Tbsp minced garlic
1 Tbsp lemon juice
1/2 tsp cinnamon
1/2 tsp dried oregano
1/2 tsp salt
1/4 tsp ground nutmeg
1/4 tsp ground cloves

YOGURT SAUCE

7 oz. cup plain greek yogurt (I used fat free)
1/4 tsp minced garlic
1/4 tsp dried dill OR 1 tablespoon fresh chopped Dill
1/4 tsp salt

6 homemade naan, pita, or flatbread ( I used these pitas for 60 calories a pop and they were incredibly tasty!)
1/2 head romaine lettuce

1 medium cucumber, sliced thinly
2 medium tomatoes, cut into 1/8ths
1 clove garlic, minced
1/4 Red Onion sliced thinly
1 tablespoon Olive Oil
Juice of 1 small lemon
Salt and Pepper to taste

STEP 1: In a small bowl, combine the ingredients for the marinade (yogurt, lemon juice, garlic, cinnamon, oregano, salt, nutmeg, and clove). Add chicken to the marinade, coat well, cover and refrigerate for 4-24 hours. If desired, slice the chicken into strips before marinating to maximize the flavor.

STEP 2: Prepare the yogurt sauce for the sandwiches. Open a 7 oz. container of plain greek yogurt and stir in the garlic, dill, and salt. Refrigerate until ready to use.

STEP 3: After marinating the chicken, grill or pan-sear until cooked through.

STEP 4: Wash and tear lettuce for sandwich. Set aside. Combine cucumber, tomato, red onion, garlic, lemon juice and olive oil. Season to taste with salt and pepper. Set aside

STEP 5: Build the chicken shawarma sandwiches. Spread the yogurt sauce on your flat bread, top with the chicken, lettuce and cucumber, tomato, onion salad. Roll the sandwich closed. You can wrap the sandwich in foil to help it stay closed as you eat.

Posted in 500 Calories or less, Chicken Dishes | 8 Comments

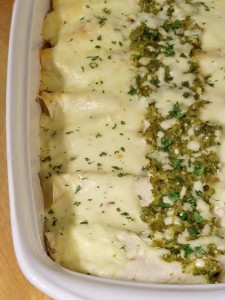
Green Chile Enchiladas

I am a huge fan of Mexican food and LOVE enchiladas. Green Chile Enchiladas are for my absolute favorite. These enchiladas come together quick, especially if you are using leftover chicken. You could make the green chile sauce ahead of time and have a meal assembled in a matter of minutes. My sauce starts off very similar to this salsa verde, which is easy! Some people prefer to pan fry their flour tortillas before filling to prevent the tortillas from becoming soggy. I’ve never found this necessary but if this works for you go right ahead!

10-12 green tomatillos, paper skin removed and tomatillos cut in half
2 Poblano peppers, cut into quarters and seeds removed
10 cloves of garlic
1/4 large onion, cut into quarters
1/4 cup cilantro, stems removed
1/2 tsp salt
1/4 tsp cumin
2 chicken breasts, cooked and shredded (I roasted my chicken breasts with salt, pepper, cumin and garlic powder. Most any leftover chicken will do)
8 oz cream cheese, cut into cubes
16 oz shredded Monterey Jack cheese
12 Tortillas

1. In a large skillet, place tomatillos flesh side down (after being cut in half), poblano pepper quarters, garlic cloves and onion. Allow to dry roast over medium heat 3-5 minutes until tomatillos become very soft, garlic and onion begin to brown and peppers begin to blister, turning once to cook all sides evenly.
2. Add peppers, tomatillos, garlic cloves, onions and cilantro to a food processor and process until smooth.
3. Add tomatillo sauce back to skillet. Season with salt and cumin. Season additionally to taste with salt and pepper. Allow to simmer over medium low heat for 3-5 minutes.
4. Reserve 1/2 cup of tomatillo sauce. Set aside.
5. Add shredded chicken to remaining sauce in skillet over medium low heat. Add cubes of cream cheese to sauce. Stir to blend.
To Assemble:
6. Spray 9 x 13 pan with non stick cooking spray.
7. Spread 1/4 cup of reserved sauce in bottom of pan.
8. Dip a brush in the rest of reserved sauce and brush 1 tortilla lightly on both sides with sauce.
9. Take 2-3 tablespoons of chicken mixture and spread in tortilla. Roll to close. Lay in pan.
10. Repeat process until all filling or tortillas are gone. (Should make 10-12 enchiladas depending on size)
11. Top Enchiladas with any extra sauce. Top with shredded cheese. Bake at 375 for 20-25 minutes until cheese is bubbly and starting to brown. Cut and serve with additional salsa and sour cream.


Posted in Chicken Dishes | 4 Comments

Menu: 12/4-12/10

Whew. This week was a DOOZIE. Next week is finals so that leaves this week to study, recover from last week and plan for Christmas. A woman’s work is never done. 😉 I’m trying hard this week to “shop” out of my pantry to help clear out some of the extra food we seem to accumulate every time I see a sale on food that I just can’t pass up. haha! Whats on your menu this week? Are you trying anything new? Any old favorites?


Sunday– Out for dinner

Monday– late class, so most likely salads.

TuesdayChicken Shawarma (can’t wait to make this!), cucumber and tomato salad on the side.

Wednesday– Rollover from two weeks ago! Chimichurri Kabobs and grilled veggies.

ThursdayPanko Crusted Cod, squash puree and roasted green beans.

FridayCabbage Rolls.

Saturday– Chili for a TON of youth at our house. 🙂

Posted in Menu Plan Suggestions | Comments Off on Menu: 12/4-12/10

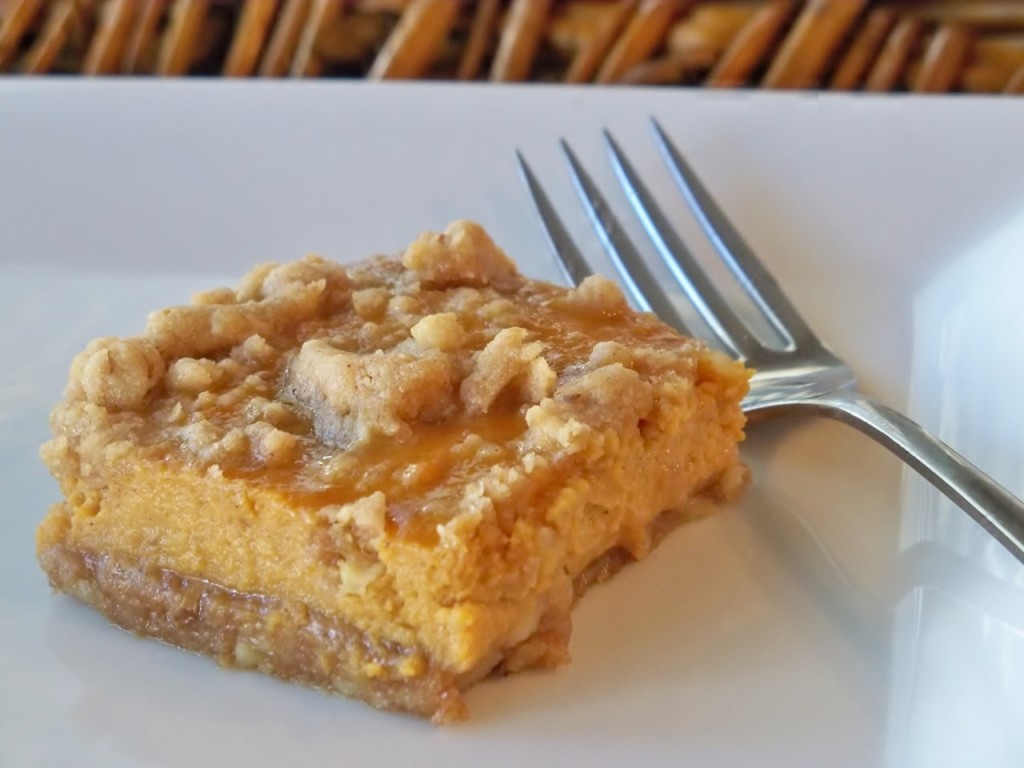
Pumpkin Pie Bars

If you had asked me a couple years ago whether I would be eating, let alone sharing a recipe for pumpkin pie bars I would have told you were crazy! I grew up hating pumpkin, especially pumpkin pie. I don’t know when it happened but suddenly I started liking pumpkin a few years ago and I’ve never looked back. I made these bars after Thanksgiving because I had an extra can of sweetened condensed milk left in the pantry. These were really tasty and travel well. Top these little jewels off with some fresh whipped cream and you’ve got yourself a beautiful dessert!

Pumpkin Pie Bars (barely adapted from here)

1 1/2 cups All Purpose Flour

1 cup finely chopped nuts

1/2 cup sugar

1/2 cup firmly packed brown sugar

2 teaspoons ground cinnamon, divided

3/4 cup butter or margarine

1 (15 ounce) can pumpkin

1 (14 ounce) can Sweetened Condensed Milk

2 eggs, beaten

1/2 teaspoon ground allspice

1/4 teaspoon salt

1 tablespoon All Purpose Flour

Directions:

1.Preheat oven to 375 degrees F. In medium bowl, combine 1 1/2 cups flour, nuts, sugars and 1 teaspoon cinnamon. Add butter, mix until crumbly. Reserve 1 cup of the mixture. Pat remaining mixture on bottom of ungreased 13×9-inch baking pan.
2.Meanwhile, in large mixing bowl, combine pumpkin, sweetened condensed milk, eggs, remaining 1 teaspoon cinnamon, allspice and salt; mix well. Pour evenly over crust. Mix reserved crumbs with 1 tablespoon flour. Sprinkle over pumpkin mixture.
3.Bake 30 to 35 minutes or until set. Cool 10 minutes. Serve warm. Store leftovers in refrigerator.

Posted in Desserts, Food for the Holidays! | 1 Comment

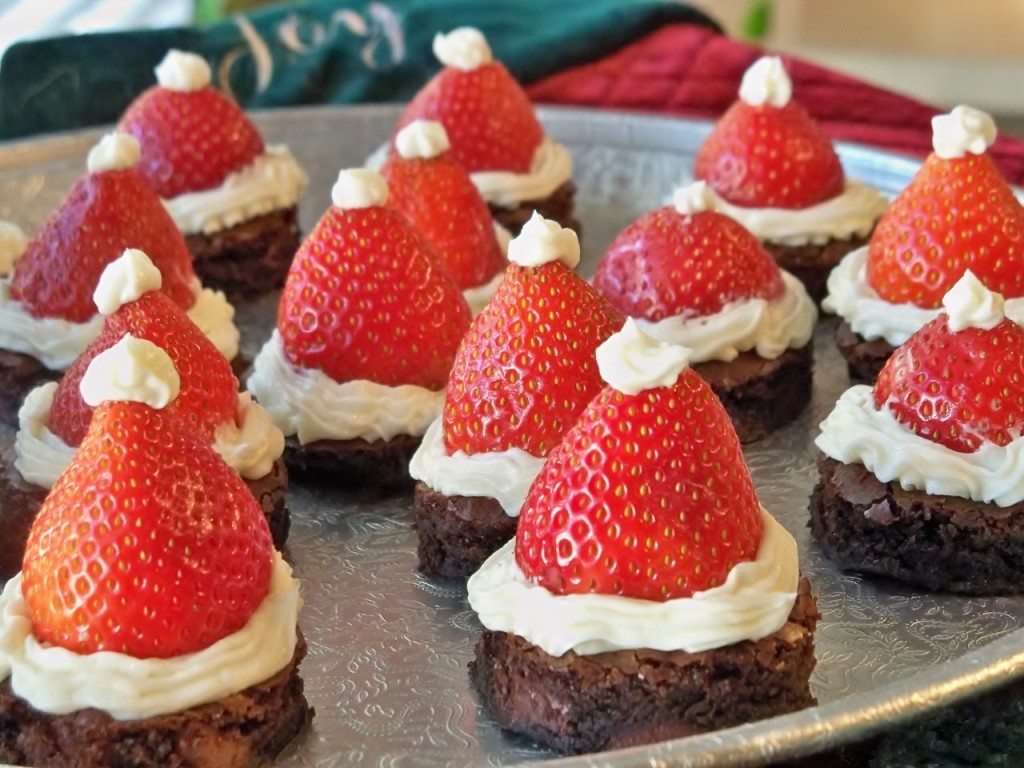
Santa Hat Brownies

I can honestly say, I squealed like 15 times while making these Santa Hat Brownies. They are absolutely adorable and they are easy! Not only are they cute as a button but the strawberry, chocolate and buttercream combination is also really delicious! I sent these in to work with my husband and they went really fast. I can’t wait to make them again (which I can assure you, will be very soon). I made fresh buttercream for the frosting but if you are in a pinch use whatever frosting you can get your hands on. Although, I must say making buttercream is SO easy! You should really give it a try. I used a high quality brownie mix for the brownies because I was in a hurry and needed to get them out of my pantry. Next time I’ll try them with brownies from scratch.

So.cute.you.must.try.these. They will be the HIT of any Christmas party!

Santa Hat Brownies
Adapted from here.

1 pan of brownies, baked and cooled
20-24 small strawberries
1 batch of buttercream frosting (or a frosting of your choice)

Buttercream Frosting
(you will have some extra buttercream left with this recipe)

Ingredients
3 cups confectioners’ sugar
1 cup butter (softened but not melted)
1 teaspoon vanilla extract
1 to 2 tablespoons whipping cream

Directions
In a standing mixer fitted with a whisk, mix together sugar and butter. Mix on low-speed until well blended and then increase speed to medium and beat for another 3 minutes.

Add vanilla and cream and continue to beat on medium speed for 1 minute more, adding more cream if needed for spreading consistency.

To Assemble Brownies:

Using a small round cookie or biscuit cutter, cut out brownies.
Clean and remove stems from strawberries, cut the stems off flat so it will sit flat on the brownie. Place strawberries point side up on the center of each brownie circle.
Using a piping bag (or zip-top bag with the corner snipped to create a piping bag in a pinch) Pipe the frosting around the strawberry for the white rim of Santa’s hat and top each strawberry point with a small drop of frosting.

Note for storage: If you plan on refrigerating these cuties, make sure you chill them uncovered first. This will allow the buttercream to harden so you don’t you lose your cute Santa hat topper to plastic wrap!

Posted in Desserts, Food for the Holidays! | 9 Comments