Roast Mojo Chicken

My friends think I’m being funny when I tell them that I really couldn’t cook when I met my husband. When we were first married I decided that I would surprise my hubby with a fancy roast chicken dinner. Of course, I had no idea what I was doing so I called my mother. Like most newlyweds I called her from the grocery store and asked her how to roast this little chicken I had just purchased. She assumed I was talking about Cornish Game Hens and told me 30 minutes or something like that for a perfectly golden bird.

SO. BAD.

My husband has a fear of two things. Anything that has a stinger and raw chicken. He doesn’t even like to touch it! So here I am, proudly standing at the edge of the table with my little carving set in hand, ready to carve open my roast chicken that had only been roasted for 30 minutes. I was so excited! Then, I carved open an almost completely raw bird. He was horrified! I was horrified! Naturally, not having a clue what I had done wrong, I decided that the best idea was to cut the chicken open, lay it flat and broil it until it was no longer raw. Thirty minutes and one small fire later, we ordered pizza.

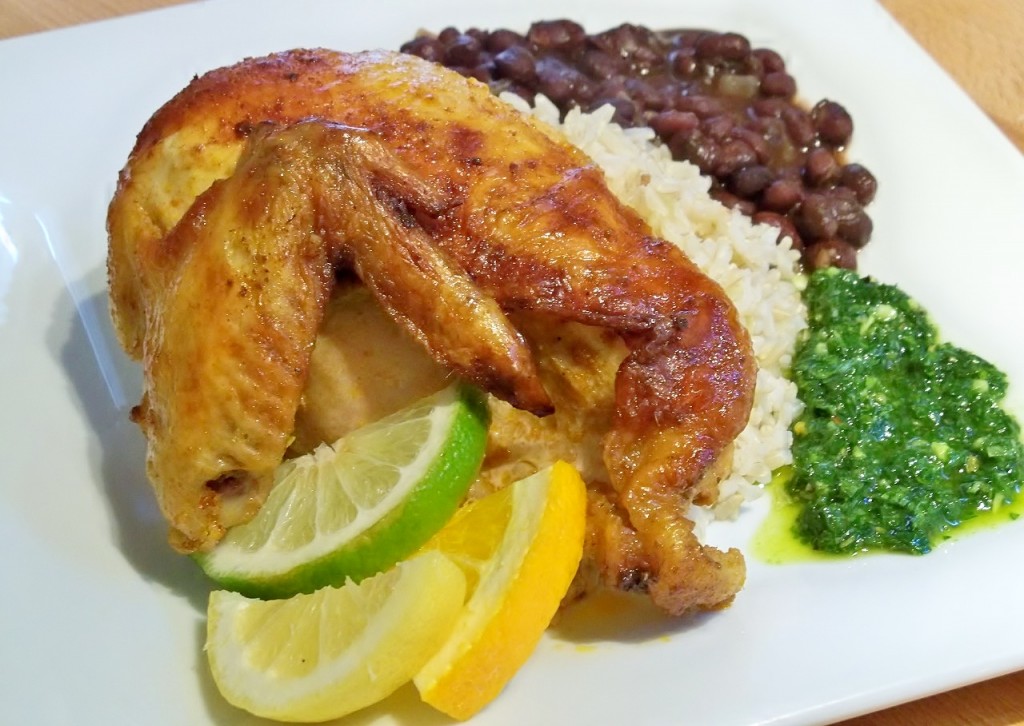
I am proud to say that I can most certainly roast a chicken now. This mojo chicken combines citrus, garlic and flavorful spices to make a delicious roast chicken! Allowing the chicken time to marinate really helps keep the chicken juicy and flavorful throughout. I served mine with chimichurri sauce, black beans and rice and it made for the perfect Sunday night dinner. 🙂

Roast Mojo Chicken
A Gourmet: Day to Day original

1 whole 3-4 lb chicken (You could also do this with a quartered chicken, just adjust the cooking time)
1/4 cup olive oil (divided)
1 tablespoon cumin
1 tablespoon paprika
1 teaspoon onion powder
1/2 teaspoon cayenne pepper
1 tablespoon garlic powder
2 teaspoons dried oregano
1 1/2 teaspoons salt (more to taste)
1/2 teaspoon pepper (more to taste)
1 teaspoon each of Orange Zest, Lemon Zest, Lime Zest (once zested, slice the citrus into rings)
Chimichurri Sauce

Directions:

To begin, dry chicken off thoroughly with a paper towel. Set aside.
In a small bowl combine all dry ingredients cumin though oregano. Mix to combine.
Take 1/8th cup of olive oil and rub all over the chicken. Next take the spice mix and coat the entire chicken well with all of it. Be sure to get a little in the cavity of the chicken. Also be sure to rub some of the spice mix underneath the skin of the breast (be careful not to tear the skin when doing this). Now do the same with the citrus zest, rubbing it into the chicken, underneath the skin of the breast and inside the cavity.
Transfer chicken to a large bowl and cover with plastic wrap. Allow to marinate 4 hours or even overnight in the refrigerator.
When you are ready to roast the chicken, remove from fridge about 30 minutes prior to cooking. To roast, preheat oven to 375 degrees. Lay slices of citrus on the bottom of the roasting pan to act as a rack for the chicken. Add a slice or two of each piece of citrus to the inside cavity of the chicken. Sprinkle chicken with salt and pepper. If you are comfortable trussing a chicken, go ahead and truss it, if not, use kitchen twine to just tie the legs together. This will help the chicken to roast more evenly.
Drizzle chicken with remaining 1/8th of a cup of olive oil.
Depending on the size of your bird, roast the chicken for an hour and half up to up to an hour and forty five minutes, uncovered. About every 30 minutes baste the chicken with the juices that have accumulated in the bottom of the pan, spooning it over the chicken. The chicken is cooked through when an instant read thermometer reads 180 degrees in the thickest part of the thigh, not touching the bone.

Allow chicken to rest for 10 minutes before carving. Drizzle with chimichurri sauce to serve.

Posted in Chicken Dishes | 2 Comments

Menu Plan: 4/28-5/5

Well hello! I know I fell off the face of the earth there for a few weeks but life has been crazy! Our catering company has really been picking up, plus I just finished my last semester of culinary school! All the finals, projects and studying are behind me. I have spent a ton of time in the kitchen, I just haven’t had the opportunity to share it with you. Be on the lookout for some yummy recipes this week! Oh and guess who is down another 6 lbs? Woohoo! Hubby is down another 2 lbs too. That brings my weight loss to 30+ and hubby’s to 40.

My Graduation is this week, which I am naturally SUPER excited for but even with that, this week will be less hectic for sure.

Saturday: Pan fried smoked salmon cakes with lemon and herb aioli, roasted potatoes and salad.

Sunday: Cuban sandwiches and oven fries

Monday: Shrimp Fajita Pasta

Tuesday: Chicken and Corn Chowder

Wednesday: Some form of stuffed chicken with pan sauce, roasted carrots and salad

Thursday: Lemon Garlic Shrimp and Grits

Friday: Aquatica (local water park) and then a concert that night for a friends band. So most likely packing lunch and eating dinner on the cheaps out. 🙂

Saturday:
GRADUATION!!!! Plus it’s Cinco De Mayo. I have zero plans to cook but do intend on celebrating! 🙂

Posted in Menu Plan Suggestions | Comments Off on Menu Plan: 4/28-5/5

Tuscan White Beans with Spinach, Shrimp and Feta

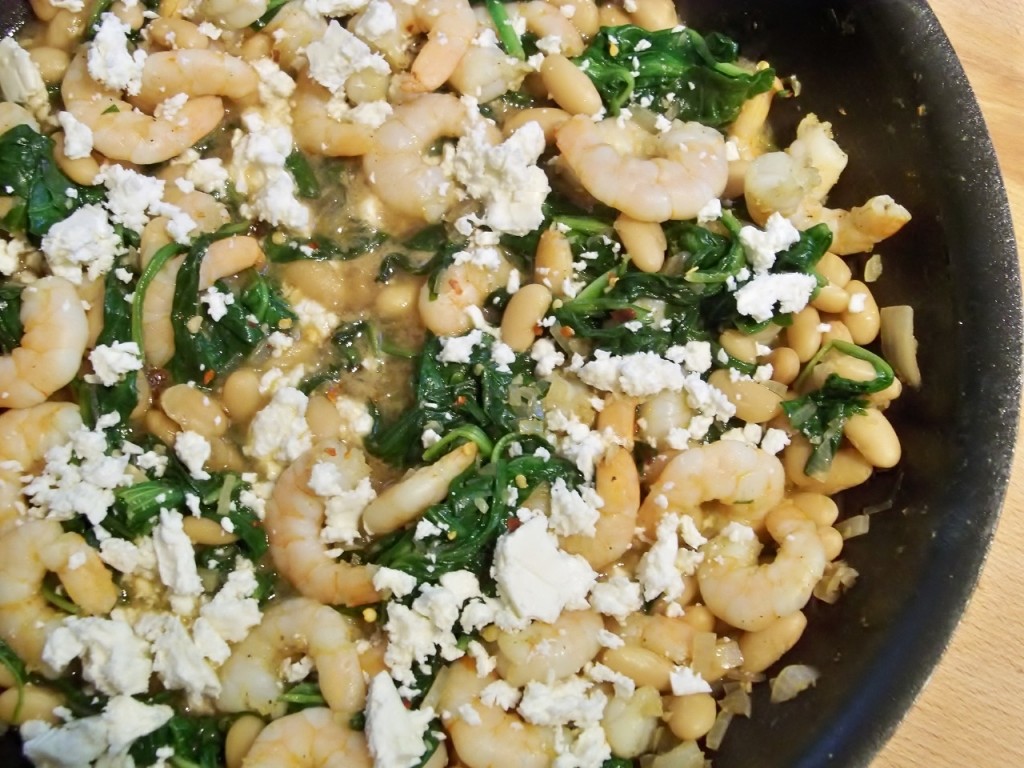
I am a big fan of a one pot meal. Especially one that comes together as quickly as this one does. Plus, it’s a dish basically made out of some of my favorite ingredients, shrimp, white beans and who could forget feta cheese? Like most “diet” recipes I doubled the amount of cheese the original recipe called for. Life is too short to skimp on the feta. If you are looking for a quick and delicious week night dinner (or lunch for that matter), look no further! We ate this as is one night and the next night served it over brown rice. I actually preferred it without the rice but try for yourself and see what you like. This would be perfect with a nice side salad! Oh and hey, it’s under 500 calories a serving, even with more cheese. Woohoo!

Enjoy!

Tuscan White Beans with Spinach, Shrimp and Feta
Slightly Adapted from: Skinny Taste

Ingredients:

2 tsp extra virgin olive oil
1 lb large shrimp, peeled and deveined (weight after peeled)
1 medium onion, chopped
4 cloves garlic, minced
2 tsp chopped fresh basil
2 tbsp balsamic vinegar
1/2 cup low sodium, fat-free chicken broth
15 oz can no-salt added cannellini beans, rinsed and drained (Eden)
5 cups baby spinach
3 oz crumbled reduced-fat feta cheese

Directions:

Heat 1 tsp oil in a large non-stick skillet over medium-high heat. Cook shrimp until just opaque, about 2 to 3 minutes. Transfer to a plate. Heat remaining oil in the same skillet over medium heat and add onion and garlic; cook 4 minutes stirring occasionally until translucent and cooked through. Stir in vinegar and cook 30 seconds. Add broth, bring to a boil and cook 2 minutes. Stir in beans, basil and spinach and cook until the spinach wilts, about 2 to 3 minutes. Remove from heat and stir in shrimp. Top with feta cheese and divide in 4 bowls.

Posted in 500 Calories or less, Seafood Dishes | 3 Comments

Menu Plan: 4/15-4/21

TWO WEEKS! Two weeks until I’m done with Culinary School. Words can’t describe my excitement! I have a large catering event at the end of the week, which I am really excited for as well. So all in all, I’m thinking this next week is going to be fantastic!

What’s on your menu this week?

Sunday: To be decided…

Monday: Healthy Sesame Chicken and Brown Rice

Tuesday: Carne Asada Tacos

Wednesday: Chicken with creamy chive sauce, crash hot potatoes.

Thursday: Bacon, Egg and Asparagus Salad

Friday: Grilled Pizza

Saturday: Catering a private event

Posted in Menu Plan Suggestions | 1 Comment

Sour Cream Coffee Cake Bars

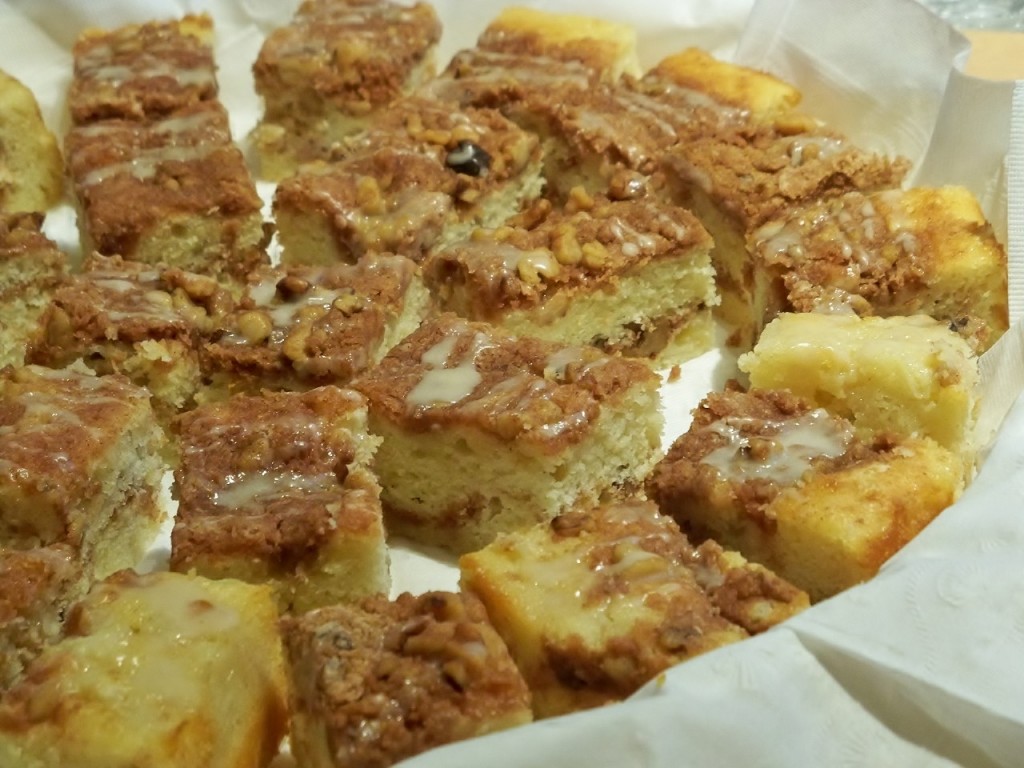
As a foodie, thanking people with food is pretty much expected. It’s how I express my gratitude and love to people. After watching how hard our pastors worked this weekend for our Easter Services (all 4 services… whew!) I knew I wanted to make them something. I would imagine the Monday after Easter is a pretty long day at a church. I had some extra sour cream in the fridge that I had stocked up on at Publix after a BOGO sale and I knew I wanted to bring something sweet. I thought sour cream coffee cake would be the perfect thank you to the staff at our church. I was really impressed with Barefoot Contessa’s recipe. I adapted it to make bars and doubled the streusel after reading some reviews that suggested it needed more. Instead of using a bundt pan, I used a regular 9 x 13 pan and it worked perfectly! These turned out super moist from the sour cream and cake flour. They are definitely a keeper!

Sour Cream Coffee Cake
Adapted from: Barefoot Contessa

Ingredients

12 tablespoons (1 1/2 sticks) unsalted butter at room temperature
1 1/2 cups granulated sugar
3 extra-large eggs at room temperature
1 1/2 teaspoons pure vanilla extract
1 1/4 cups sour cream
2 1/2 cups cake flour (not self-rising)
2 teaspoons baking powder
1/2 teaspoon baking soda
1/2 teaspoon kosher salt

For the streusel:

1/2 cup light brown sugar, packed
1 cup all-purpose flour
3 teaspoons ground cinnamon
1/2 teaspoon kosher salt
6 tablespoons cold unsalted butter, cut into pieces
3/4 cup chopped walnuts, optional

For the glaze:

1/2 cup confectioners’ sugar
2 tablespoons real maple syrup

Directions

Preheat the oven to 350 degrees F. Grease and flour a 9 by 13 pan.

Cream the butter and sugar in the bowl of an electric mixer fitted with the paddle attachment for 4 to 5 minutes, until light. Add the eggs 1 at a time, then add the vanilla and sour cream. In a separate bowl, sift together the flour, baking powder, baking soda, and salt. With the mixer on low, add the flour mixture to the batter until just combined. Finish stirring with a spatula to be sure the batter is completely mixed.

For the streusel, place the brown sugar, flour, cinnamon, salt, and butter in a bowl and pinch together with your fingers until it forms a crumble. Mix in the walnuts, if desired.

Spoon half the batter into the pan and spread it out with a knife. Sprinkle with half of the streusel. Spoon the rest of the batter in the pan, spread it out, and scatter the remaining streusel on top. Bake for 35-40 minutes, until a cake tester comes out clean.

Let cool on a wire rack for at least 30 minutes. Whisk the confectioners’ sugar and maple syrup together, adding a few drops of water if necessary, to make the glaze runny. Drizzle as much as you like over the cake with a fork or spoon.

Posted in Breakfast | 1 Comment

Asian Beef Burgers with Sriracha Aioli

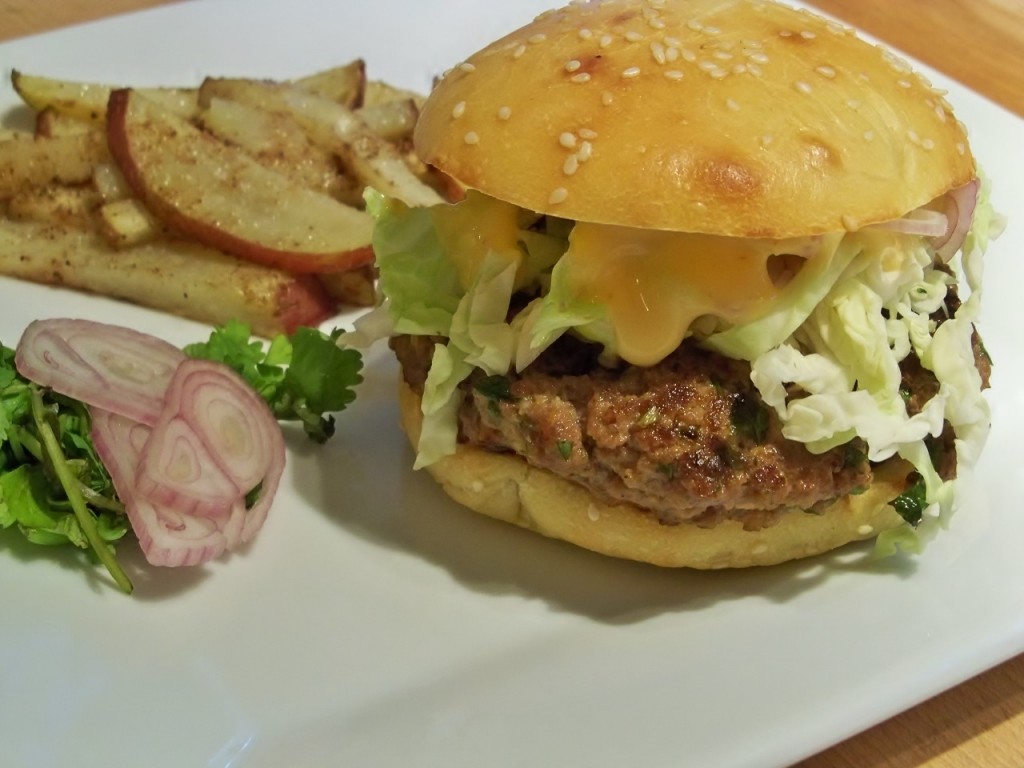
It’s spring time and burgers are being made all over America. Of course here in Florida we skip Spring and go straight from “Winter” to Summer. We’ve been crazy busy lately, so we’ve really been trying to take advantage of hearty sandwiches for quick week night dinners. I can’t even remember the last time I made a plain old cheeseburger at home. Sure I like your standard burger with cheese but who cares about those, when I can make a burger like this. An incredible burger that is loaded with flavor, topped with thin sliced crunchy cabbage, shallots and a spicy aioli (a deconstructed Asian slaw if you will). If you’ve never heard of Sriracha (impossible!), then you must try it! You can get it just about anywhere now for $2-$3 a bottle and it is delicious. It is by far my husbands favorite condiment. I’m pretty thankful that a meal like this that can come together in 20 or 30 minutes. Make this burger and see for yourself! Enjoy!

Asian Beef Burgers with Sriracha Aioli
Asian Beef Burgers: Adapted from here
Sriracha Aioli: Gourmet Day to Day Original

1 1⁄2 lbs ground chuck
1⁄4 cup chopped cilantro leaves
4 garlic cloves, minced
1 heaping tablespoon grated fresh ginger
1 tablespoon sesame oil
1 teaspoon Sriracha
1 teaspoon kosher salt
4 Burger Buns
1-2 cups thinly sliced cabbage
1 shallot, sliced thinly (red onion or yellow onion could be used as well, thinly sliced is the key!)
3/4 cup Sriracha Aioli (see recipe below)

INSTRUCTIONS

Place the beef, cilantro, garlic, ginger and sesame oil in a large mixing bowl and, using your hands, gently mix until the ingredients are evenly incorporated.
Place the beef on a work surface and divide into 4 balls of equal size. Form each into a patty about 3⁄4 to 1 inch thick, tossing it back and forth between your hands. To ensure more even cooking, make a 1⁄2-inch indentation with your thumb in the center of the burger. Handle the patties as little as possible; do not work more than necessary.
Prepare a grill to medium-high. When the coals are glowing red, after 15 to 20 minutes, cover with the grate. After 5 minutes, use a wire brush to thoroughly clean the grate. Brush the grate with oil. When the coals are covered with pale gray ash and you can leave your hand 5 inches above the fire for 2 to 3 seconds, the coals are ready.
Sprinkle both sides of the burgers with the salt. Place the burgers on the grate and grill until well seared on both sides, about 5 minutes for medium rare or 6 minutes for medium. Transfer to buns or a serving platter on greens and serve immediately.
Alternatively, place a cast iron skillet over high heat and when it is hot but not smoking add the burgers to the dry pan. Cook until well seared on both sides, 8 to 10 minutes for medium rare or 10 to 12 minutes for medium.

To serve: Toast burger buns lightly, top burger with shredded cabbage, 2-3 thin slices of shallot and 1 tablespoon of Sriracha Aioli. Devour promptly.

Sriracha Aioli

Ingredients

2 egg yolks
1 teaspoon white wine vinegar
1/2 teaspoon Dijon mustard
1 teaspoon Sriracha hot chile sauce
2 cloves of garlic, minced
1/4 teaspoon sesame oil
3/4 cup canola oil, divided
salt and pepper to taste

Preparation

Combine all ingredients (egg yolks through minced garlic) in medium bowl. Whisk until blended, about 30 seconds.

Using 1/4 teaspoon measure and whisking constantly, add 1/4 cup oil to yolk mixture, a few drops at a time, about 4 minutes. Gradually add remaining 1/2 cup oil and sesame oil in a very slow thin stream, whisking constantly, until mayonnaise is thick, about 8 minutes (mayonnaise will be lighter in color). Cover and chill. do ahead Can be made up to 2 days ahead. Keep chilled.

This can also be done in about 90 seconds with a food processor (yet another reason why I love my food processor). Add all ingredients (egg yolks through minced garlic) to the food processor and turn on. Slowly begin to stream in oil (start with a drop or two at a time and then continue adding oil in a thin stream) continue until all oil has been added and aioli is thick. Season to taste with salt and pepper.

Posted in Beef Dishes, Quick and Easy Recipes | 3 Comments

Menu Plan: 4/1-4/7

Hi! Remember me? I feel like I haven’t been able to keep up with the website for the last two weeks! Things are going well but holy cow have we been busy! We are doing well on our diet, as of last week I’m down another 1.8 lbs! Woohoo! Trying to keep our schedule simple this week (yeah right) and keep it light and healthy during the week.

Sunday: SeaWorld with friends. Can’t wait!

Monday: Chicken with Creamy Green Chile, Tomatillo and Avocado Sauce, cumin roasted potatoes and some sort of a green veggie

Tuesday: Brothy Chinese Noodles

Wednesday: Late night out, planning on sandwiches or leftovers

Thursday: Soy Lime Pork Tenderloin, brown Rice, cardamom glazed carrots

Friday: Roll over from two weeks ago. I’ve been craving this Youvarlakia!

Saturday: Pot Roast, mashed potatoes and roasted vegetables

Posted in Menu Plan Suggestions | 1 Comment