Garlic Lime Chicken with Chimichurri Sauce

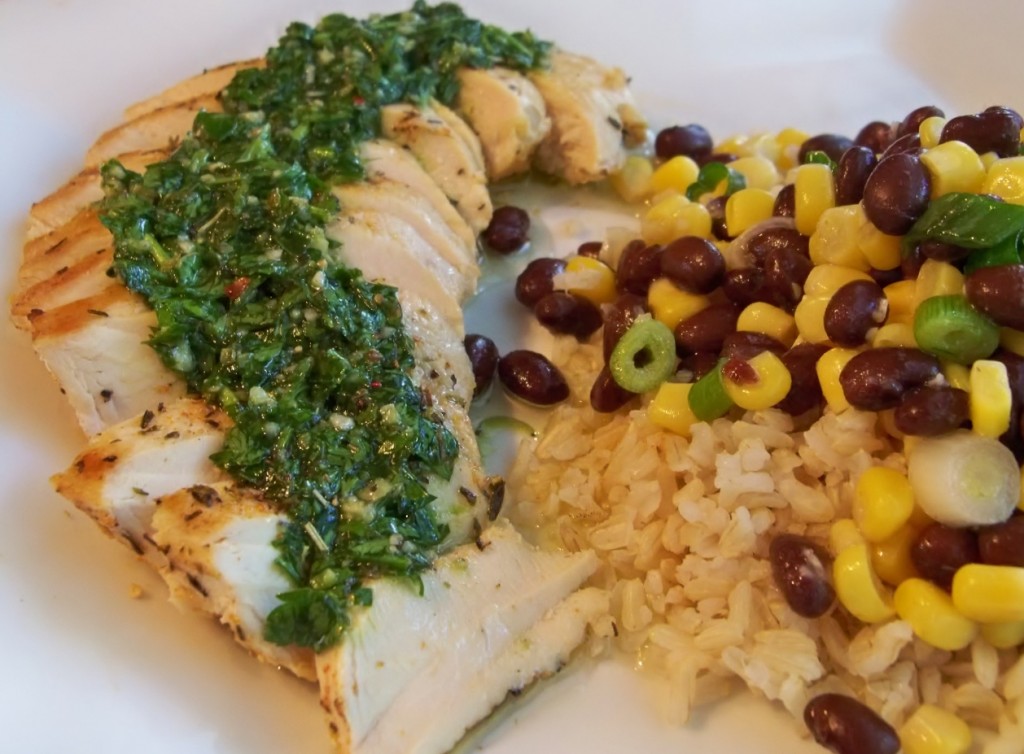
I am pretty obsessed with anything citrus. Lemons, limes or oranges it doesn’t matter to me. So when I can have a quick and pretty healthy dinner come together with one of my favorite ingredients, I am all for it. Plus, it makes use of my new favorite sauce for the summer, chimichurri. With our busy schedule, I love the idea of making a quick chicken dish and serving it over my brown rice from the freezer. A quick, flavorful meal perfect for any Summer night! Don’t mind if I do!


Garlic Lime Chicken with Chimichurri Sauce

Garlic Lime Chicken from Random Anderson

3/4 teaspoon salt
1/4 teaspoon black pepper
1/4 teaspoon cayenne pepper
1/8 teaspoon paprika
1/4 teaspoon garlic powder
1/8 teaspoon onion powder
1/4 teaspoon dried thyme
1/4 teaspoon dried parsley
4 boneless, skinless chicken breast halves

2 tablespoons butter
1 tablespoon olive oil
2 teaspoons garlic powder
3 tablespoons lime juice

1 cup of Chimichurri Sauce

1. In a small bowl, mix together salt, black pepper, cayenne, paprika, 1/4 teaspoon garlic powder, onion powder, thyme and parsley. Sprinkle spice mixture generously on both sides of chicken breasts.
2. Heat butter and olive oil in a large heavy skillet over medium heat. Saute chicken until golden brown, about 6 minutes on each side. Sprinkle with 2 teaspoons garlic powder and lime juice. Cook 5 minutes, stirring frequently to coat evenly with sauce.
3. Remove chicken from pan and top each chicken breast with 2-3 tablespoons of chimichurri sauce.

Posted in Chicken Dishes, Quick and Easy Recipes | 5 Comments

Menu Plan: 3/24-3/31

Well I survived another week. Lord knows I didn’t cook much for my poor husband last week. Although I definitely spent a lot of time in the kitchen. I’m thinking this week will be fairly quiet, so I’ll take advantage of it while I can!

Sunday: Planning on a lovely dinner with friends. Can’t wait!

Monday: Crispy Herbed Shrimp with Chive Aioli, roasted asparagus, tomatoes and brown rice.

Tuesday: Chicken with goat cheese and sundried tomato sauce, potato stacks, green beans

Wednesday: Pesto Fish, spinach stuffed tomatoes and leftover brown rice.

Thursday: Chicken Shawarma

Friday: Private Chef Event

Saturday: Out of town

What’s on your menu this week?

Posted in Menu Plan Suggestions | Comments Off on Menu Plan: 3/24-3/31

Chimichurri for a Cause

I am all for supporting a good cause. Especially if it is for someone as sweet as my friend Jey over at The Jey of Cooking. After her mother received a life saving heart transplant, she decided to start raising money to support the American Heart Association. Jey will be donating one dollar for every post with a heart healthy recipe submitted to her blog fundraiser.
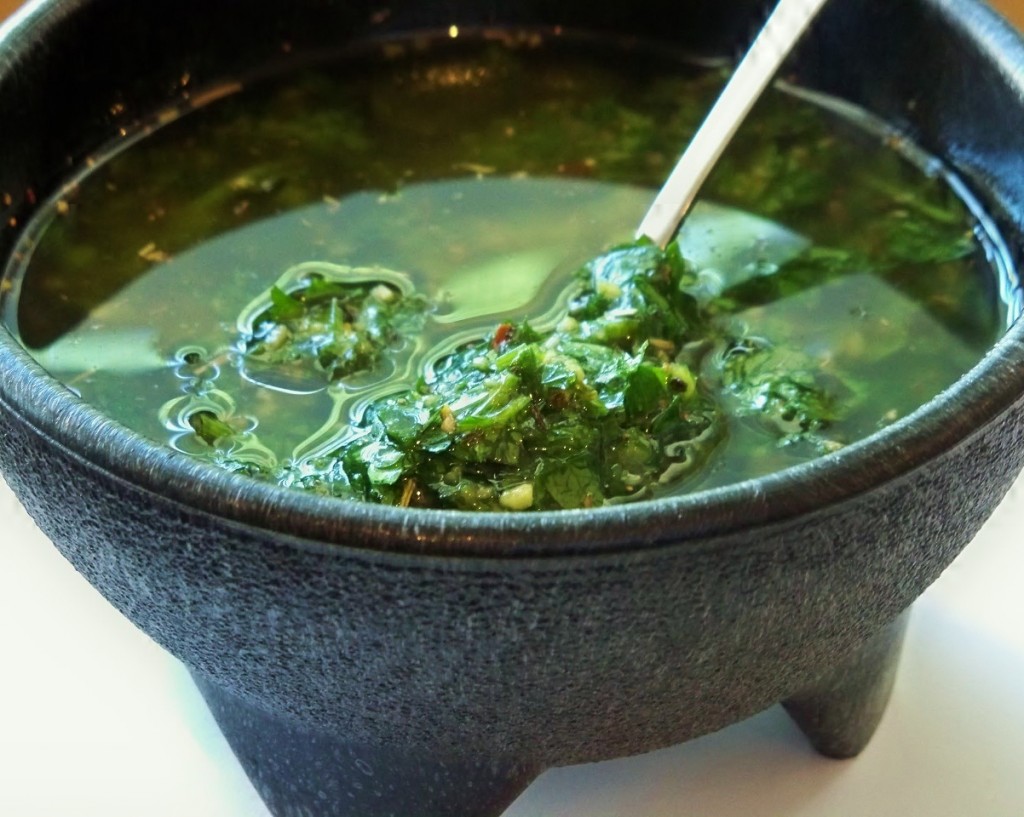
So for my recipe, I chose Chimichurri. A delicious fresh sauce made with heart healthy olive oil, herbs and garlic. Many studies have shown that especially in women, a diet that includes olive oil and leafy vegetables helps reduce the risk of heart disease. Chimichurri is perfect on grilled steak, chicken or fish. I also serve it over brown rice and it is delicious. Even better, it comes together in a minute or two and can be made ahead of time. So, now that it is the perfect weather to grill, get out there and grill up some beautiful lean meat and enjoy this sauce!

Check out the post over at The Jey of Cooking, if you are interested in donating for her cause!

Chimichurri
Source: Simple Recipes

Ingredients

1 cup firmly packed fresh flat-leaf parsley, trimmed of thick stems
3-4 garlic cloves
2 Tbsps fresh oregano leaves (can sub 2 teaspoons dried oregano)
1/2 cup olive oil
2 Tbsp red or white wine vinegar
1 teaspoon sea salt
1/4 teaspoon freshly ground black pepper
1/4 teaspoon red pepper flakes

Method

1 Finely chop the parsley, fresh oregano, and garlic (or process in a food processor several pulses). Place in a small bowl.

2 Stir in the olive oil, vinegar, salt, pepper, and red pepper flakes. Adjust seasonings.

Serve immediately or refrigerate. If chilled, return to room temperature before serving. Can keep for a day or two.

Posted in Side Dishes, The Basics..., Vegetarian Dishes | 7 Comments

Menu “Plan”: 3/18-3/24

I use the word “plan” in menu plan loosely. I am currently working a MASSIVE local event until Tuesday and then have several papers to catch up on before the end of the semester sneaks up on me. So the name of the game is simple and reheat-able this week.

Sunday: Using up the leftover corned beef from St. Patricks Day and making Reuben Sandwiches. Our favorite!

Monday: Leftovers

Tuesday: Athenian Orzo

Wednesday: Shanghai stir fried pork and cabbage, brown rice

Thursday: Youvarlakia, salads

Friday: Leftovers

Saturday: Going out! 🙂

Posted in Menu Plan Suggestions | 2 Comments

Chicken and Biscuit Pot Pie

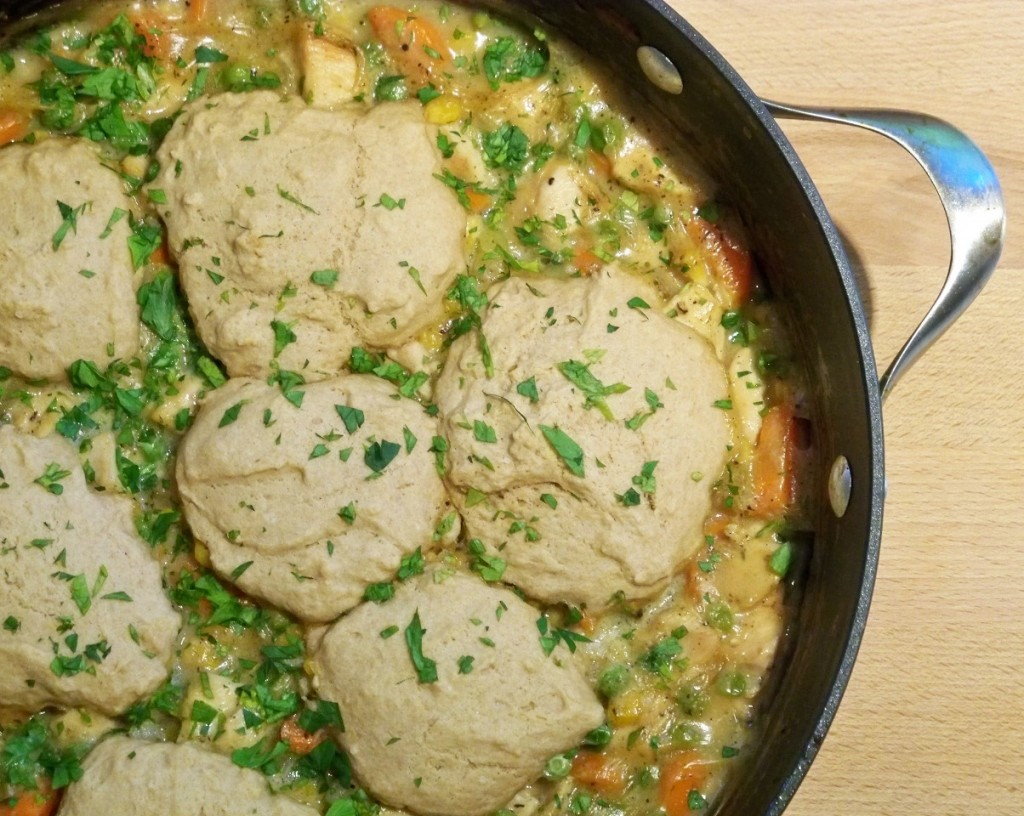
Talk about comfort food! I love the idea of having something as delicious as pot pie without the work of making a crust. Especially on a week night! I found this great recipe over at Adventures in my Kitchen and was pretty impressed at just how easily everything came together. To make this even better, it comes in at 400 calories per serving.

A delicious, guilt free pot pie with no crust to worry about? That’s what I’m talking about!
Chicken and Biscuit Pot Pie
(Barely adapted from Adventures in my Kitchen)

Cooking spray
3/4 tsp salt
1/2 tsp freshly ground black pepper
1/2 teaspoon garlic powder
1 1/2 lbs boneless, skinless chicken breast
s, cut into chunks
4 tsp olive oil
1 medium onion, chopped
2 medium carrots, chopped
2 celery stalks, chopped
1/2 lb green beans, trimmed and chopped into 1/2-inch pieces (corn would work here too)
2 cloves garlic, minced
1 1/2 cups lowfat milk
1/4 cup all-purpose flour
1 cup low-sodium chicken broth
1 cup peas, thawed if frozen
1 1/2 Tbsp fresh thyme leaves (you can substitute 3/4 tsp dried thyme)

1/2 cup whole-wheat flour
1/4 cup all-purpose flour
3/4 tsp baking powder
1/4 tsp baking soda
1/4 tsp salt
3 tbsp cold unsalted butter, cut into small pieces
2 tsp canola oil
1/2 cup lowfat buttermilk

To make the filling: Preheat the oven to 375 degrees F. Spray a large shallow casserole dish, or 6 individual casserole dishes with cooking spray. (I used my oven safe skillet.)

Season the chicken with 1/4 teaspoon each salt, garlic powder and pepper. In a large nonstick skillet, heat 2 teaspoons of the oil over a medium-high heat. Add the chicken to the pan and cook for 5 minutes, stirring occasionally. Transfer the chicken with its juices to a bowl.

Add olive oil to skillet and heat it over a medium-high heat. Add the onions, carrots and celery and cook until the vegetables begin to soften, about 4-5 minutes. Add the green beans, garlic and remaining salt and pepper and cook for 2 minute more. Add the milk.

Stir the flour into the broth until it is completely dissolved and add to the pan. Cook, stirring, until the mixture comes to a boil.

Reduce the heat to medium-low and cook for 2 minutes more. Return the chicken with its juices back to the pan. Add the peas and thyme and stir to combine. Season with salt and pepper, to taste. Spoon the mixture into the baking dish or individual dishes. (If using oven safe skillet, you can use the same pan.)

To make the crust: Put the whole-wheat flour, all-purpose flour, baking powder, baking soda and salt into a food processor and pulse a few times to combine. Add the butter and pulse about 12 times, or until pebble sized pieces are formed. (You can also hand mix it using a fork.)

Add the buttermilk, then oil to the food processor and pulse until just moistened. Do not over mix.

Drop the batter in 6 mounds on top of the chicken mixture (1 mound on each individual dish, if using) spreading the batter out slightly. Bake until filling is bubbling and the biscuit topping is golden brown, about 20 minutes. Serves 6.

Nutritional analysis per serving
Calories 400
Total Fat 17 g
(Sat Fat 5.7 g, Mono Fat 7.7 g, Poly Fat 2.7 g)
Protein 31 g
Carb 31 g
Fiber 5 g
Cholesterol 82 mg
Sodium 600 mg
Posted in 500 Calories or less, Chicken Dishes | 2 Comments

Tips & Tricks: Cooking and Freezing Perfect Brown Rice

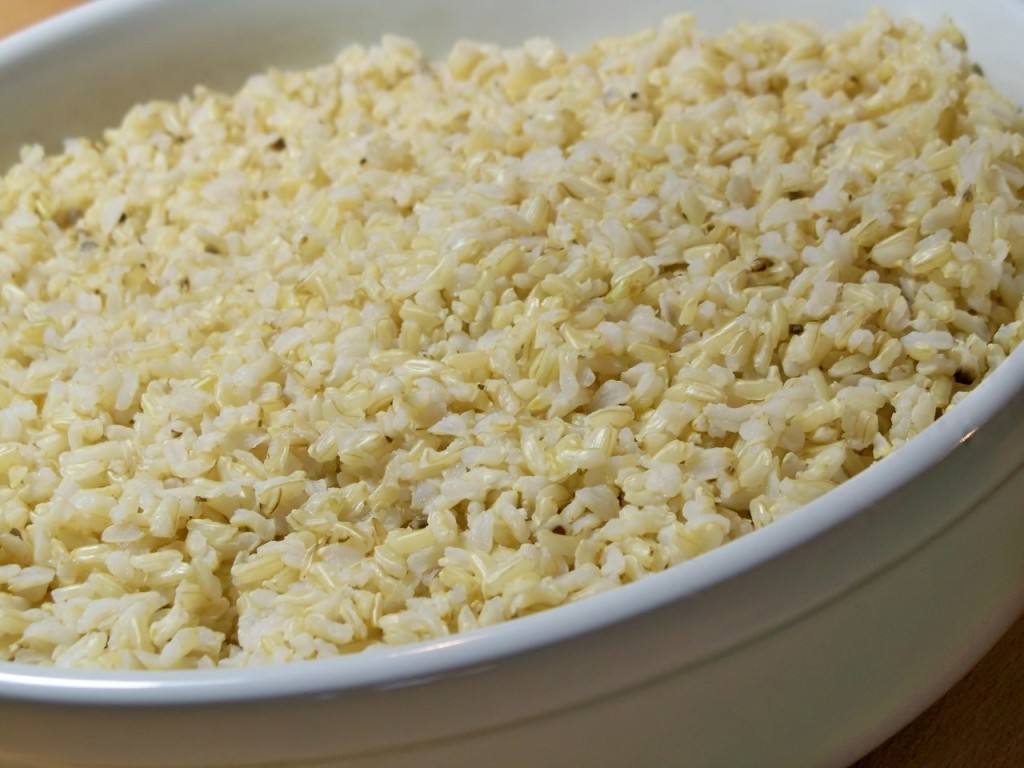
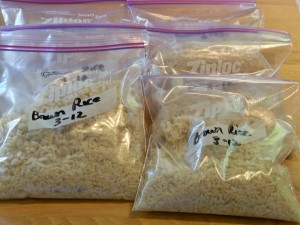
I used to hate cooking brown rice. I always screwed it up and I felt like it took forever! Then one of my Chefs showed me the best way I’ve found to cook brown rice and I will never look back! It is simple, doesn’t require super specific measurements and makes it easy to cook large quantities of brown rice at a time. Every few weeks I make a batch of brown rice and freeze it in 2 cup batches. It takes 90 seconds to warm it up in the microwave and I have brown rice in seconds on a week night. I love that! I’ve seen similar methods to this all over the internet, so I am certainly not claiming this recipe as an original recipe of mine but since I learned it in class, I will just write it as such.

Perfect Brown Rice

Brown Rice (I cook at least 16 oz uncooked rice at a time, up to 32 oz)
8 + quarts water
Kosher Salt

Bring a large stock pot with water to a boil. Season with salt, as you would pasta water. Once water is at a rolling boil, add rice. Stir well. Keep lid off! Stir occasionally to prevent rice from sticking on the bottom. Boil for 30-35 minutes. Test rice grain to make sure rice is cooked through all the way. Once rice is cooked through, drain in a wire mesh strainer. Rinse with cold water until the water runs clear. Allow to cool. The result is perfectly fluffy brown rice that doesn’t stick together at all. The way brown rice was meant to be! 🙂

Remember 1 cup uncooked rice = 4 cups cooked rice

You can either serve this immediately by warming up the amount you want in a pan with a bit of butter or you can put the rice in a bowl and microwave for 2 minutes.

To freeze: portion out the amount you would use for your family for dinner (for us, it’s two cups cooked rice per bag). To defrost: Place in the refrigerator (I pull mine from the freezer in the morning before I leave) or run warm water over the freezer bag until defrosted.

I will never cook brown rice any other way again!

Posted in Side Dishes, The Basics..., Tips In The Kitchen... | 4 Comments

Baked Cake Doughnuts with Chocolate Glaze

When I saw these beautiful doughnuts over at PreventionRd I totally drooled. Then, like just about everything she makes, I saw that they were also low in calories.

I can’t lie. I suspected black magic.

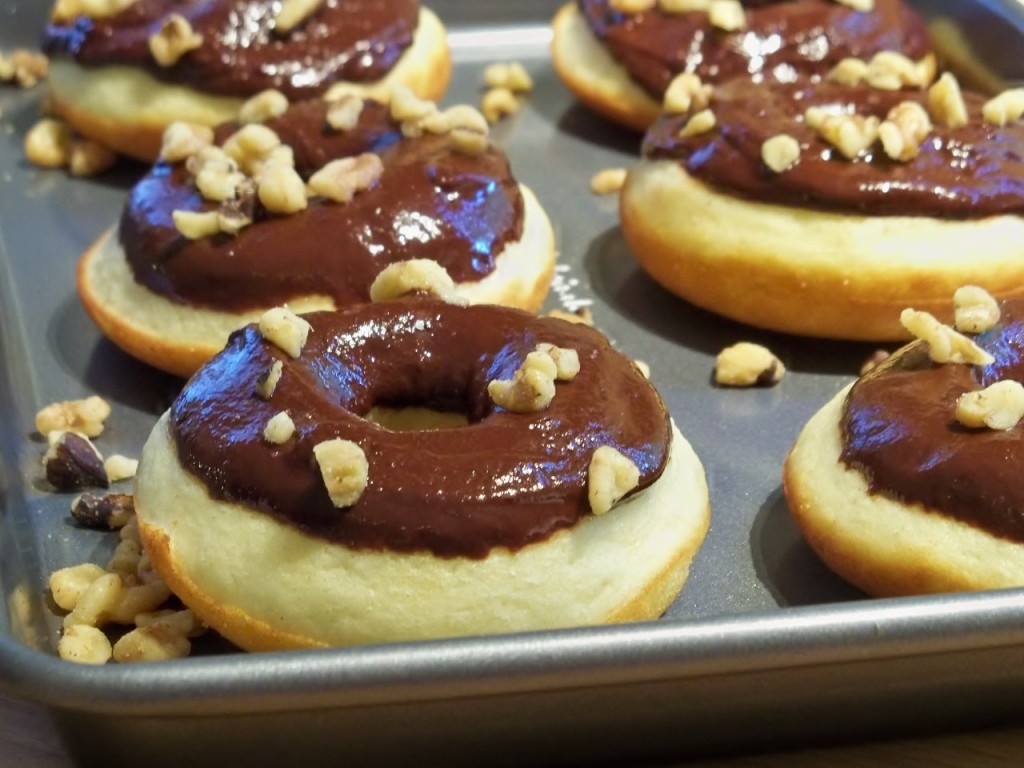
I was more than pleasantly surprised at just how delicious these doughnuts turned out! The cake doughnut was just that – cakey, delicious and very filling. The glaze was chocolatey and went perfectly with the doughnuts. Recipes like this make me oh so happy that I own a doughnut pan. The dough came together in a matter of minutes and breakfast was ready in under 30 minutes. I should point out though, I only got 12 doughnuts out of this recipe. Maybe I have a larger doughnut pan, I’m not quite sure. I added another 50 calories on per doughnut to account for this when calculating calories. Still. I ate two freaking delicious doughnuts for 300 calories. I’m not complaining.

Baked Cake Donuts

Doughnuts:
2 cups cake flour, sifted (of 1 3/4 cup all-purpose flour + 1/4 cup cornstarch)
1/2 cup granulated sugar
2 tsp baking powder
1 tsp salt
3/4 cup fat-free milk
1 Tbsp white vinegar
2 large eggs, lightly beaten
1 Tbsp unsalted butter, melted

Chocolate Glaze:
1/2 cup semi-sweet chocolate chips
2 tsp corn syrup
1 Tbsp canola oil
1 tsp water

Directions:

Mix milk with vinegar. Set aside to turn into buttermilk!

Preheat your oven to 425 F. Spray your donut pan with non-stick spray.

In a medium-sized mixing bowl bowl, whisk together the melted butter, buttermilk, and beaten eggs. In a large mixing bowl, sift together the cake flour (or flour + cornstarch), sugar, baking powder, and salt. Add the wet ingredients to the dry ingredients and stir together until just combined.

Carefully spoon the batter into about 2/3 full. Bake for 7-8 minutes, or until the tops of the donuts spring back when lightly touched.

Allow to cool in the pan for a couple minutes. Remove the donuts onto a rack to finish cooling before you glaze them.

For the glaze, microwave all the ingredients together in a microwave safe bowl on 50% power for about 1 minute, stirring in-between, until melted. Add additional water (by the half teaspoon), if needed to thin. Dip one half of each doughnut into the chocolate and allow to dry on a drying rack. Yield: 18 doughnuts with glaze

Nutrition Information (per doughnut): 106 calories; 2.7 g. fat; 24 mg. cholesterol; 194 mg. sodium; 18.7 g. carbohydrate; 0.3 g. fiber; 2.5 g. protein

Posted in 500 Calories or less, Breakfast | 4 Comments