No-Butter Chicken

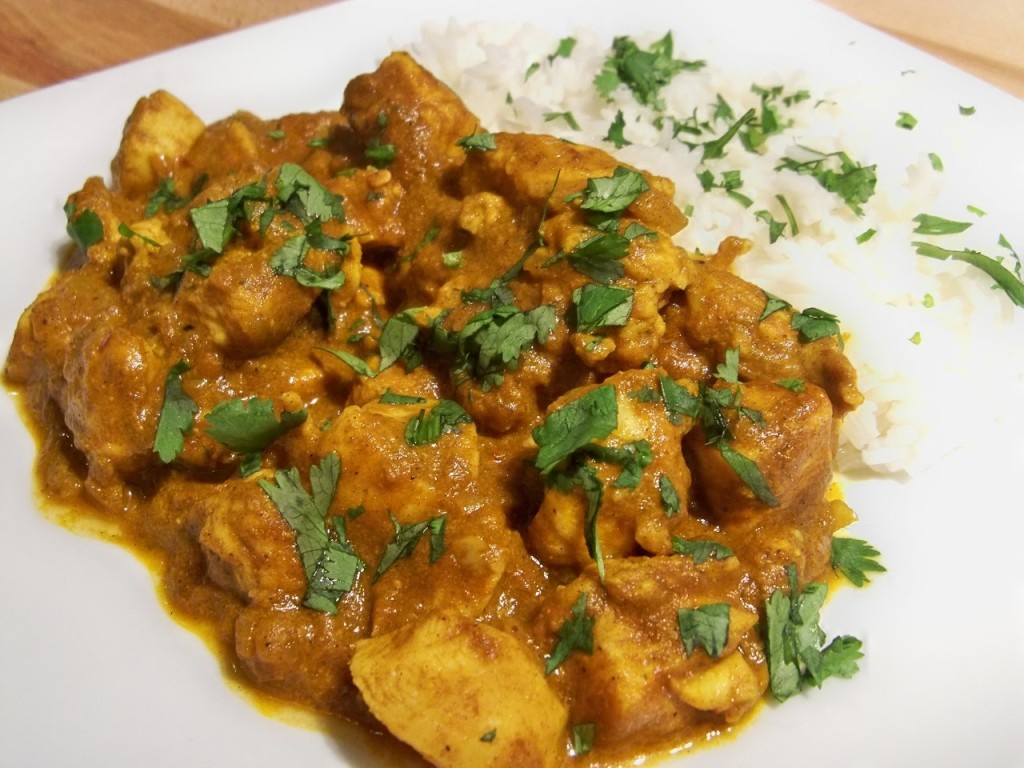
I’m not gonna lie. I get pretty excited about anything involving butter. Even if it is only in the name. This is a lightened up version of butter chicken, not because it doesn’t have butter (there isn’t butter in butter chicken to begin with) but because the oil has been cut reduced and by substituting a non fat yogurt. This comes together in a matter of minutes and makes for a delicious meal at home any night of the week. If you are craving a flavorful, easy dish you really should give this a try!

No-Butter Chicken
Slightly adapted from: Apple A Day

Ingredients:
1 TBSP grapeseed or olive oil
1 small red onion, chopped
2 TBSP chopped garlic
1 TBSP chopped ginger
2 TBSP tomato paste
1 TBSP brown sugar (I used dark)
1 TBSP cumin seeds
1 TBSP garam masala
1 tsp. red chile flakes
1 tsp. turmeric
1 tsp. salt
1 lb. boneless, skinless chicken breasts, cut into cubes
1/4 c. non fat plain yogurt (Greek yogurt works really well here)
1/2 c. water
rice or roti, for serving
cilantro, for garnish (my addition)

Directions:
1. Put a large skillet over medium-high heat and add oil. When the oil heats, add the onion, garlic, and ginger. Cook for 4 minutes, or until the onion is golden. Add the tomato paste, brown sugar,cumin seeds, garam masala, red chile flakes, turmeric, and salt and cook 2 minutes more.

2. Add the chicken cubes and stir well to coat. Add yogurt and water and cook, stirring until the chicken is done, about 8 minutes. Serve, garnished with cilantro, over rice or scoop up with roti. Serves 4.

Posted in Chicken Dishes, Quick and Easy Recipes | 3 Comments

Menu Plan: 2/26-3/3

Man this week is going to be aweeeeesome. Not so much for menu planning though. We will be out most the week, so hang in there until next week. Meanwhile, I will be doing some cooking this week, just not a lot. 🙂


Sunday: Dinner with friends. To be decided…. 🙂

Monday: Birthday present! Going to SeaWorld!

Tuesday: The perks of being a Florida resident, headed to Aquatica!

Wednesday: It’s going to be a busy day, so I’m pulling Mini Bacon Meatballs from the freezer and serving them over whole wheat linguine with spicy marinara sauce.

Thursday: Athenian Orzo and salad.

Friday: Carne Asada Tacos and rice with jalapenos, cilantro and lime.

Saturday: Out for sushi with family.

Posted in Menu Plan Suggestions | 1 Comment

Super Crispy Oven Fried Fish

I really wanted to say fishy so my title would rhyme. I am such a nerd.
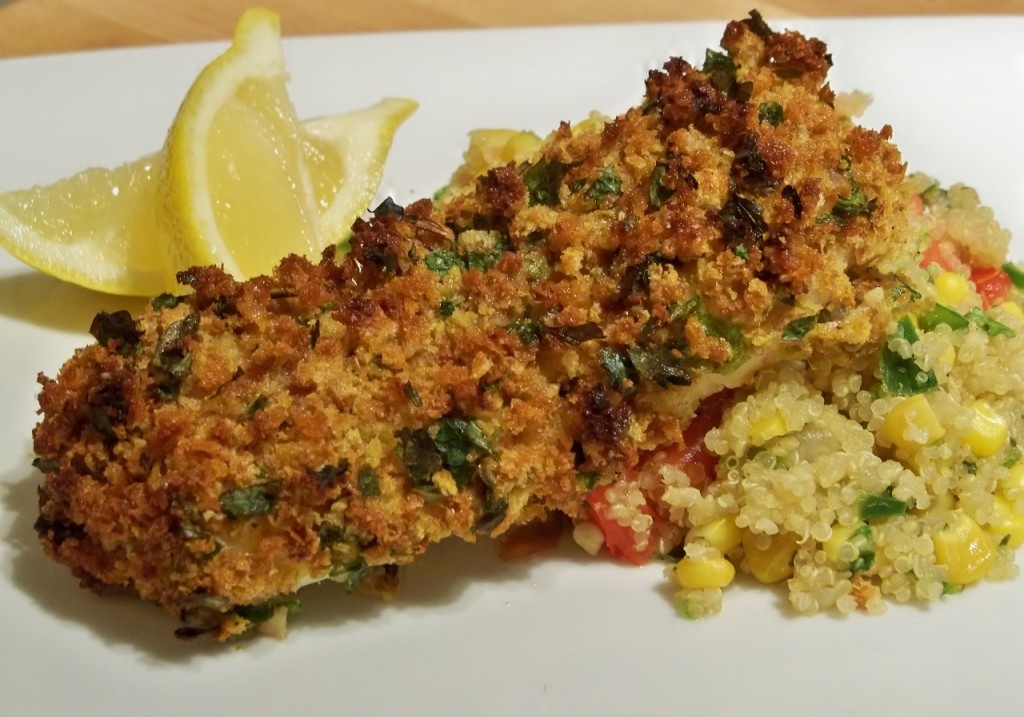
I was pretty skeptical when I first saw this recipe over at Cooking with the Big Dogs. It looked delicious, don’t get me wrong but I just wasn’t sure about how something battered would get crispy in the oven. The secret is definitely in the rack that you cook on and in the outer coating. This was, just as the title says, super crispy and really delicious! The shallot on the outside of the fish, which I initially thought would burn added such a lovely flavor to the crust. I guess I should stop being so skeptical! The more you can prep ahead of time with this meal, the better. Giving about 20 minutes to prep the breading station and about 20 minutes for baking, this fish still qualifies as a good weeknight meal. Especially if you make your breadcrumbs the night before. Which is what I’ll do next time.

Super-Crisp Oven-fried Fish
Serves: 4

Ingredients

4 slices whole-wheat sandwich bread, torn into 1-inch pieces
1 tablespoon canola oil
salt and pepper
2 tablespoons minced fresh parsley
1 small shallot, minced
1/2 cup all-purpose flour
2 large eggs
3 tablespoons light mayonnaise
1/2 teaspoon paprika
1/4 teaspoon cayenne pepper
4 (6-ounce) cod or haddock fillets (we used cod because it was on sale) 1-1 1/2 inches thick)
lemon wedges, for serving

Instructions

Adjust the oven rack to the middle position and heat oven to 350 degrees. Pulse the bread in a food processor until coarse crumbs form (about 10 pulses). Transfer the crumbs to a baking sheet and stir in the oil, 1/4 teaspoon salt & pepper, each. Spread the crumbs over the baking sheet and bake, stirring occasionally, until golden brown and dry (about 10-12 minutes)
Remove the crumbs from the oven and set aside to cool for about 15 minutes. Increase the oven temperature to 425 degrees and spray a wire rack with vegetable oil spray well (or if you don’t have any, simply brush the rack with oil, like I did). and place the rack over a cookie sheet
Transfer the cooled crumbs into a shallow bowl and mix in the parsley and shallot. Spread 3 tablespoons of flour into another shallow dish. In a third shallow dish, whisk together the eggs, mayonnaise, paprika, cayenne and 1/4 teaspoon pepper together. Then whisk in the remaining flour until a smooth, thick batter is formed.
Pat each piece of fish completely dry with a paper towel and season with salt and pepper. Working on one fish at a time, dredge into the flour, then dip it into egg batter and finally coat it with the bread crumbs, pressing on each piece to adhere. Lay the breaded fish on the prepared wire rack.
Bake the fish until the coating is golden and the fish flakes easily when gently poked with a fork, about 18-25 minutes. Be sure to keep an eye on your fish if it isn’t too thick, like mine, as it will be done a lot quicker. Gently transfer the fish to individuals plates and serve with lemon wedges.

Serving size: 1 fish Calories: 290 Fat: 8g Saturated fat: 1.5g Carbohydrates: 17g Fiber: 1g Protein: 35g


Posted in 500 Calories or less, Seafood Dishes | 10 Comments

Fresh Whole Wheat Pasta

I feel like it should go without saying that I love pasta. Honestly, who doesn’t? It’s hard to really compare fresh pasta to dried pasta. Dried pasta, like what you buy in the store, really needs to be cooked to al-dente (meaning, it should have a little bite to it). Fresh pasta doesn’t really cook to al-dente, it cooks quickly, typically in about 3 minutes. The result? Beautifully tender pasta that has a delicate bite to it and is made to soak up sauce. I used my friends pasta maker attachment for my Kitchen Aid mixer, first running it through the roller, then the linguine cutter. The instructions below are written for hand rolling and hand cutting. Use whatever works for you, I’ll include the instructions for both. I found using King Arthur’s White Whole Wheat Flour made all the difference in the world (I am absolutely not being paid to say that, but it really is awesome). The flour is milled finer, has a lighter texture and it is amazing in this pasta.

After making one pound of this pasta and tasting it, I went and bought a dozen and a half eggs and made 5 pounds of this pasta for my freezer the next day. This pasta is that good!

Fresh Whole Wheat Pasta
Adapted from: Chocolate Chip Trips

1 cup unbleached all-purpose flour
1 cup whole wheat flour
3 large eggs, beaten
1 Tb water
1/2 tsp salt
1 tsp extra-virgin olive oil

1. Combine the flours and mound the mixture on a clean counter.
2. Combine the eggs, water, salt, and oil.
3. Make a large well in the center of the mound and slowly pour in the egg mixture a little bit at a time. Mix the flour with the wet ingredients until all of the wet ingredients are absorbed. Do not force the dough to use all the flour, just take as much as needed to incorporate all the wet ingredients. (This can be done in the food processor as well, add all ingredients at once and pulse until dough is the consistency of cous cous)
4. Knead the dough for at least 10 minutes. (I only had to knead for 5 minutes when I used the food processor)
5. Cover the dough in plastic wrap and place in the refrigerator for 1 hour.
6. Divide the dough into four equal pieces. On a well-floured surface, roll out each piece into a thin sheet, one at a time. The dough should be about 1/8 inch thick, thin enough to detect the outline of your hand.
7. Cut the dough into strips of desired thickness.
8. Let the strips dry on a pasta dryer (or a homemade pasta dryer!) for at least 2 hours.
9. Note: Fresh pasta takes much less time to cook. Check the pasta after 3 minutes depending on the size of your pasta.

If you are using a pasta making attachment

Follow the steps through step 5.
Divide the dough into four equal sized pieces and form to fit into the pasta roller attachment. Run through until 1/8th inch thick. Set pasta on floured surface, while you roll the remaining 3 pieces. Don’t stack the pasta sheets, they may stick together.
Cut each strip in half horizontally, each half should be about the length from your finger tip to elbow.
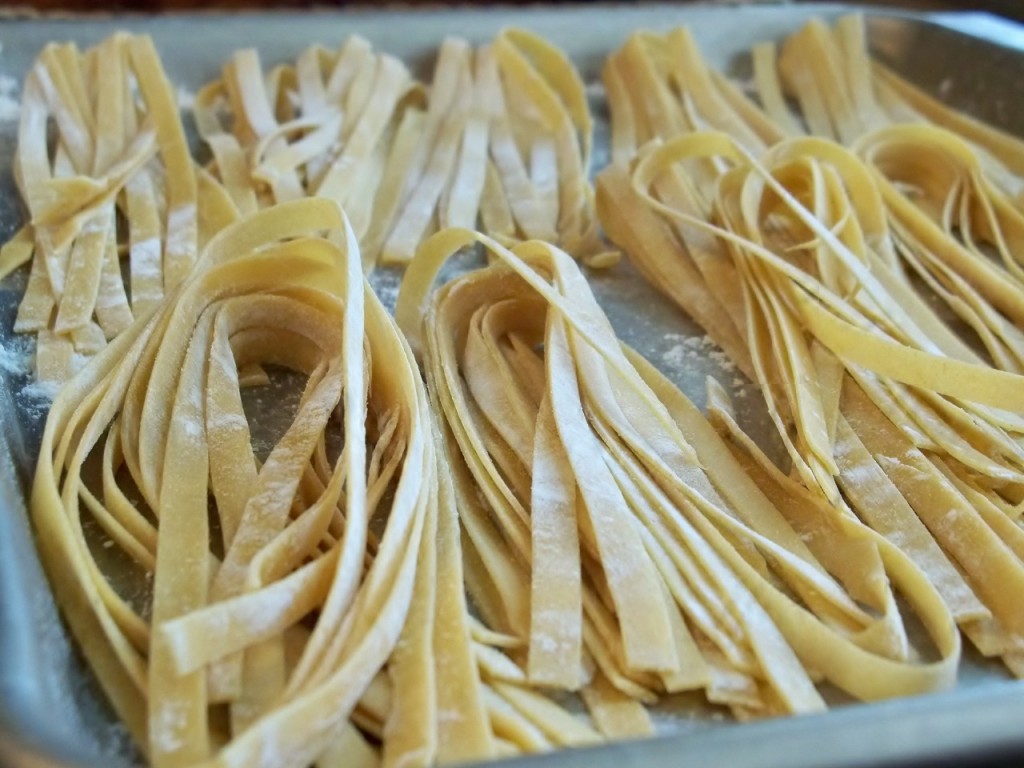
Run each half through pasta cutting attachment with your desired shape. Pictured above is cut with the linguine attachment. Immediately once your pasta is cut, lay on pasta drying rack to dry. Or in my case, sanitize 3 broom handles and prop them between two counters.

Allow to partially dry 1-2 hours. Either use the pasta that day or lay flat onto a sheet pan (as pictured above) cover with plastic wrap. Freeze 1-2 hours, then place pasta in freezer safe bag and lay carefully in freezer. I store the pasta at the top of my freezer so I can see them. That way I don’t slam a pound of meat on my partially dried noodles.
You can boil the noodles straight from the freezer for about 3-4 minutes (depending on the size of the noodle) in salted water.

Posted in Side Dishes, The Basics... | 4 Comments

Quinoa Pilaf with Corn and Jalapenos

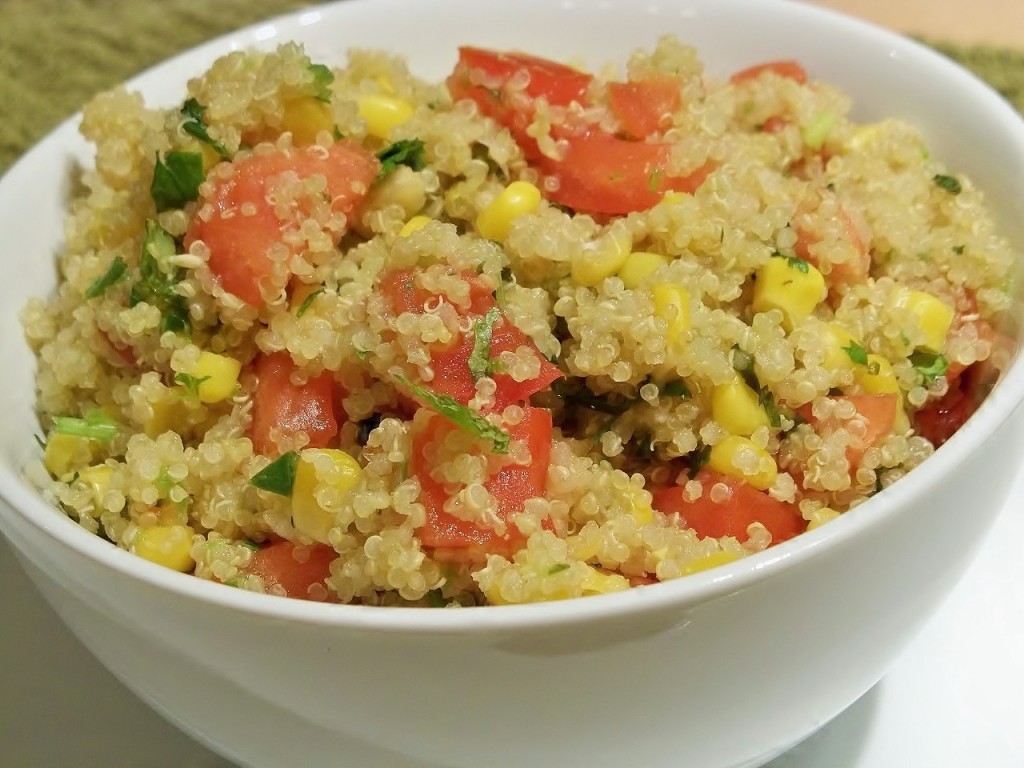
It’s hard to believe I had never had quinoa. I see it everywhere and when you are trying to eat healthier, variety with your side dishes really matter! After seeing this recipe over at Cooking with the Big Dogs, I knew I had to give it a try. If I was ever going to like quinoa, I knew it would be with corn, jalapeno and tomatoes. I was right! This was such an EASY, delicious side dish that was really hearty too. The recipe makes enough for 6-8 servings, so we split this over a few meals. If you have been curious about making quinoa and looking for a recipe to start with. Try this one!


Quinoa Pilaf with Corn and Jalapeños

Ingredients

2 teaspoons olive oil
1 1/2 cups of corn (I used a 15 oz can of low sodium canned corn, fresh would be great too!)
1 onion, minced
salt and pepper
1 1/2 cups quinoa, rinsed and dried on a towel
1 1/4 cups low-sodium vegetable broth (I used low sodium chicken broth, use what you have)
2 jalapeño chiles, stemmed and seeded
1 tomato, cored, seeded and chopped small
1/4 cup minced fresh cilantro
2 teaspoons fresh lime juice

Instructions

Heat 1 teaspoon of oil in a large saucepan over medium-high heat until shimmering. Add the corn and cook until it begins to brown, about 5 minutes. Transfer to a bowl and set aside.
Add the remaining teaspoon oil, onion, and 1/4 teaspoon salt to the saucepan. Cover and cook over medium-low heat, stirring occasionally, until the onion is softened, about 8-10 minutes.
Stir in the quinoa and increase the heat to medium and cook, stirring often, until the quinoa is lightly toasted and aromatic, about 5 minutes. Stir in the broth and jalapeños and bring to a simmer.
Reduce the heat to low, cover and continue to simmer until the quinoa is transparent and tender, 16-18 minutes.
Remove the pot from the heat and lay a clean folded kitchen towel underneath the lid. Let it sit for 10 minutes, then fluff the quinoa with a fork. Stir in the cooked corn, tomato, cilantro and lime juice. Season with salt and pepper to taste and serve.

Serving size: 3/4 cup Calories: 190 Fat: 4.5g Saturated fat: 0 g Carbohydrates: 32g Fiber: 4g Protein: 7g

Posted in Side Dishes, Vegetarian Dishes | 5 Comments

Menu Plan: 2/19-2/25

Man oh man. This week is going to be great! This week our friend Abby is throwing a SLUMBER PARTY for myself and my twin sister for our 7th birthday. You read that right. We are indeed leap year babies and because we only get birthdays every 4 years, we make them good when we get them. Unfortunately, our birthday falls on a Wednesday this year so we are partying with friends earlier in the week. Because, now we are old and have jobs and bedtimes and all that jazz. Either way, Friday will be a blast! I can’t wait!

Sunday: Cuban sandwiches and garlic oven fries

Monday: Dinner with family

Tuesday: Chicken with goat cheese and sun-dried tomato sauce, mashed cauliflower and salad.

Wednesday: No-Butter Chicken and Basmati Rice

Thursday: Pork Chops au Poivre and roasted vegetables

Friday: Slumber Party! Bagel bites, pizza rolls and other snacks from our youth and there will definitely be a sundae bar. In the morning we’re having waffles. Lots and Lots of waffles. 😀

Saturday: TBD, if we don’t go out, it will be deep dish pizza at home. 🙂

Posted in Menu Plan Suggestions | 1 Comment

Youvarlakia

I think Elly at Elly Says Opa said it perfectly. Youva-whata? We spent a solid 5 minutes trying to figure out how to pronounce this dish while making it. Call it whatever you want, I call it delicious. I was really surprised at just how creamy the egg made this. The combination of lemon, rice and meatballs is phenomenal. It’s not quite a stew (not really thick enough) but I wouldn’t call it a soup either. I would describe it more as a meatball dish with a very flavorful, thickish sauce. We cut back on the lemon slightly from what the recipe stated, which I have reflected below. If you are looking for a really creative, unique dinner that will satisfy everyone give this a try.

Oh and if delicious and easy wasn’t enough, it comes in at under 500 calories per serving. Hooray for Greek Food! If you haven’t checked out Ellys blog, please do. She is fabulous, witty and makes pretty amazing food!
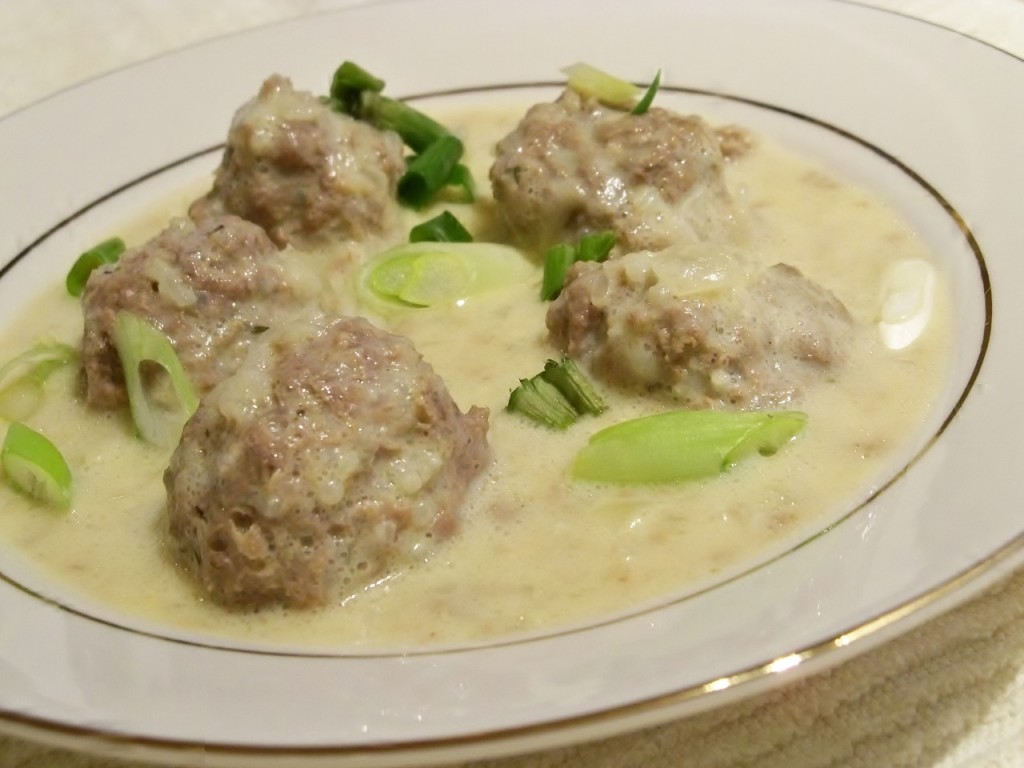


Just a side note: I feel fresh lemon is absolutely crucial to this recipe. Please don’t use the bottled stuff! There are very few ingredients to the dish, so quality really counts here.

Youvarlakia
Barely Adapted from Elly Says Opa

1 Tbsp. butter
1 medium onion, divided
4 cups broth
1 to 1.25 lb. lean ground beef
1 tsp. salt
1/2 cup uncooked white rice
1 egg, lightly beaten
3  Tbsp. fresh parsley or 1  Tbsp. dried
fresh dill, to taste (optional)
ground pepper, to taste

Avgolemono Sauce
3 eggs
1/3 cup fresh lemon juice, (This should be between 1-2 large lemons, add more to taste)
hot broth from cooking youvarlakia


To make the soup and meatballs: Cut the onion in half. Finely mince or grate one half and put in a large bowl.

Dice the other half of the onion. Heat a medium sized (4 qt)  pot or Dutch oven over medium heat, and add the butter. Stir in the diced onion and cook until translucent. Add the broth to the pot and bring to a light boil.

Meanwhile, make the meatballs. To the grated/minced onion, add the beef, salt, parsley, dill (if using), ground pepper, uncooked rice and beaten egg. Form the mixture into 1″ meatballs (you will get around 25).

Drop the meatballs into the simmering broth. Reduce heat and simmer, partially covered, for about 20-25 minutes, until meatballs cook through and rice is done. Remove from heat.

To make the avgolemono sauce: In a medium bowl, whisk the 3 eggs with the lemon juice until combined.

Slowly drizzle hot broth from the meatballs by the ladle-full into the egg/lemon mixture, whisking continuously so as not to scramble the eggs. Repeat until about half the broth from the pot is in the bowl.

Slowly pour the egg/lemon/broth mixture back into the meatballs, stirring as you do so. Season to taste with salt and pepper. If you think you would like more lemon juice, add as you see fit.

Note: the temperature of the broth is enough to cook the eggs; however, if you are worried, you can always reheat the mixture over very low heat, stirring, before serving.


Nutrition info per servings (4 servings). Note: I used 96% lean beef, but this calorie information is using 93% lean. Calories: 361 / Fat: 15.2g / Carbs: 25g / Fiber: 1.1g / Protein: 32.7

Posted in 500 Calories or less, Beef Dishes | 3 Comments