Soft Pretzel Bites with Cheese Sauce

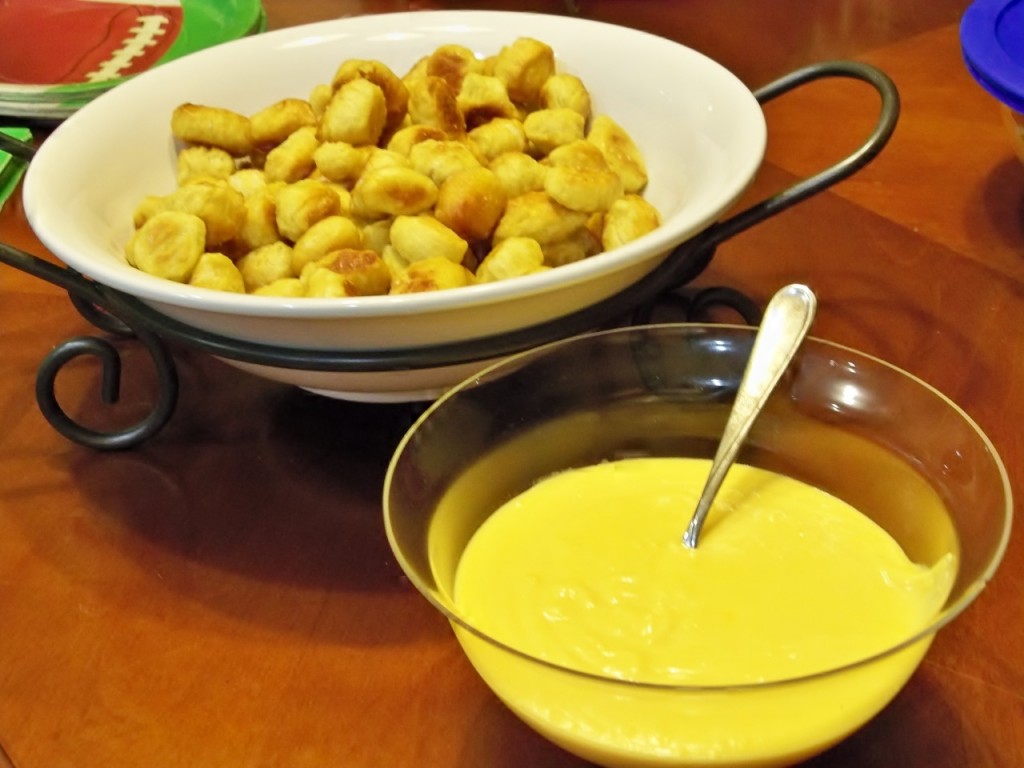
I’m sure there aren’t many people who would turn down a warm, chewy, salty, soft pretzel. Naturally, when I saw this recipe over at Smells Like Home the week before the Superbowl, I knew I had to make it. I brought these to a Super Bowl party that my friends hosted and they were such a hit! The cheese sauce is sharp and creamy and it was the perfect accompaniment to the pretzels. The pretzels themselves weren’t hard to make but they did take a little time. The recipe makes a ton of pretzels which is fantastic! If you are making them for a movie night in or a small party, you could easily cut the recipe in half.

Whatever you do, don’t run out! You may find yourself trying to steal one – by any means necessary. (ahem, see below). You don’t get much klassier than me folks.

Sorry the photo isn’t stellar, I was busy watching a game I know nothing about. 🙂
Soft Pretzel Bites with Cheese Sauce

Ingredients:

1 1/2 cups warm (110 to 115 degrees F) water
1 tbsp sugar
2 tsp kosher salt
2 1/4 tsp instant yeast
22 ounces all-purpose flour, approximately 4 1/2 cups
2 ounces unsalted butter, melted
Vegetable oil
10 cups water
2/3 cup baking soda
2 tbsp butter, melted
Pretzel or Kosher salt

Instructions:

In the bowl of a stand mixer fitted with the paddle attachment, mix together the water, yeast, sugar, and yeast on low speed for 10 seconds. Switch to the dough hook and add the flour and butter. Mix on low speed until well combined. Change to medium speed and knead until the dough is smooth and pulls away from the side of the bowl, approximately 4 to 5 minutes. Remove the dough from the bowl and transfer it to a well-oiled bowl. Cover the bowl tightly with plastic wrap and set it in a warm place for approximately 50 to 55 minutes or until the dough has doubled in size.
Preheat the oven to 425 degrees F. Line 2 large baking sheets with parchment paper. Set aside.
Bring the 10 cups of water and the baking soda to a rolling boil in an wide 8-quart saucepan or roasting pan.
In the meantime, turn the dough out onto a slightly oiled work surface and divide into 8 equal pieces. Roll out each piece of dough into a 24-inch rope. Slice each rope into 1-inch pieces. Place a lightly damp towel over the pretzel pieces to prevent them from drying out while you roll and cut the other pieces.
Using a slotted spoon lower a handful of the pretzel pieces into the boiling water and boil them for 30 seconds, flipping them around in the water with the spoon a couple of times. Remove the pretzel pieces from the water using the spoon, drain as best you can, and place them on the baking sheets. Brush the top of each pretzel with the melted butter and sprinkle with the pretzel/Kosher salt. Bake until dark golden brown in color, approximately 10 – 12 minutes. Brush with remaining melted butter before serving. Serve warm.

For the cheese sauce:

Ingredients:

2 tbsp unsalted butter
2 tbsp all-purpose flour
1 cup milk
8 oz extra sharp cheddar cheese, shredded (not package pre-shredded cheese – shred your own)
Kosher salt

Instructions:

In a small saucepan set over medium heat, melt the butter. Whisk in the flour and cook for 30 seconds, whisking constantly.
Slowly whisk in the milk until no lumps of flour remain. Stirring constantly, bring the milk to a simmer over medium-low heat until it thickens, about 3-5 minutes. Remove the pan from the stove and stir in the shredded cheese until all of the cheese has melted. Add a pinch of salt, if needed. Serve warm. Leftovers can be reheated in the microwave on medium power at 30 second intervals.

Posted in Appetizers | 4 Comments

Carne Asada Tacos

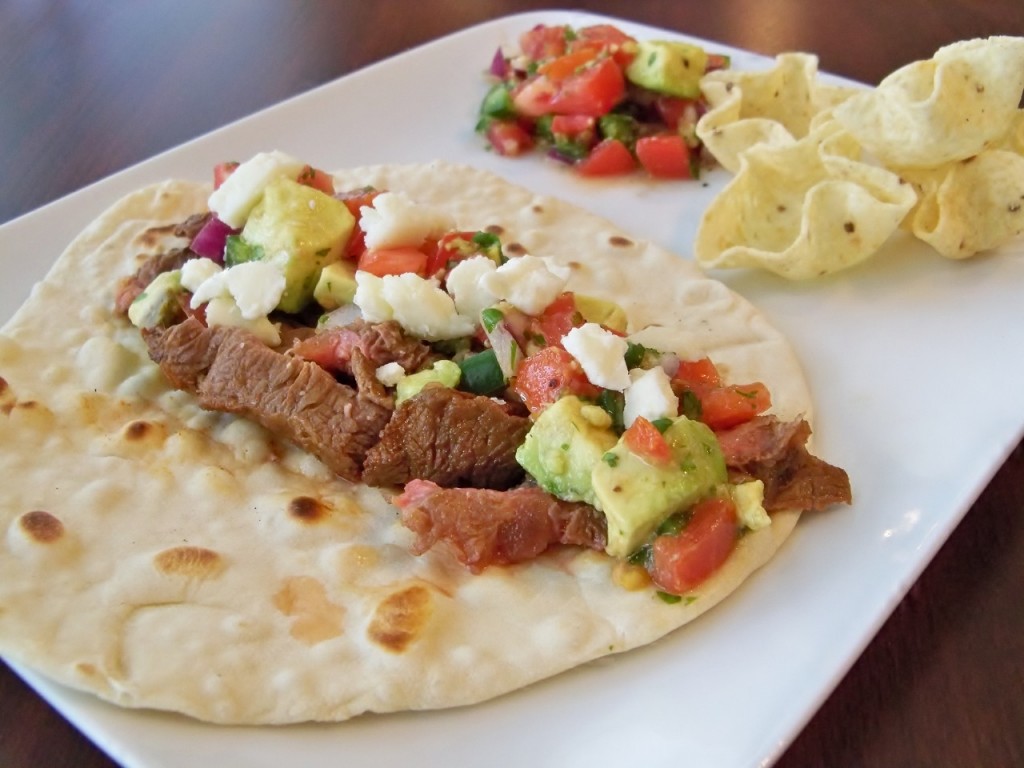
One thing I’ve noticed since my husband and I started eating healthier is that we eat more ethnic food now then we ever have. The spices and cooking methods in many ethnic dishes really complement our new lifestyle. Plus, change is always good! A fellow blogger recommended these and I immediately put them on our menu.  The marinated steak tasted delicious on our homemade tortillas. Because I wouldn’t be using the Cojita cheese called for in the recipe for anything else on my menu, I used reduced fat crumbled feta cheese instead and it worked perfectly. Two tacos for 350ish calories and they were loaded with flavor, I love that! I pretty much love anything topped with avocado pico de gallo and these were no different. These will definitely be made again in our house.

Carne Asada Tacos

8 servings, 2 tacos each | Active Time: 30 minutes | Total Time: 30 minutes
Ingredients

1/2 cup white vinegar
2 tablespoons chili powder
2 tablespoons extra-virgin olive oil
2 3/4 teaspoons salt, divided
1 teaspoon garlic powder
2 pounds flank or skirt steak, trimmed and cut into 3 equal portions
1 pound tomatoes, chopped
2-4 fresh jalapeño peppers or serrano chiles, seeded and finely diced
1/2 cup chopped onion
1/2 cup chopped fresh cilantro
1 ripe but slightly firm avocado, diced
Juice of 1 lime
16 5- to 6-inch corn or whole-wheat flour tortillas, warmed
1/3 cup crumbled Cotija cheese (or crumbled reduced fat feta cheese)

Preparation

Whisk vinegar, chili powder, oil, 2 teaspoons salt and garlic powder in a 9-by-13-inch baking dish. Add steak and turn to coat. Cover and marinate in the refrigerator for at least 1 hour and up to 24 hours.
Make salsa about 20 minutes (and up to 2 hours) before cooking the meat: Gently combine tomatoes, jalapeños (or chiles) to taste, onion, cilantro, avocado, lime juice and the remaining 3/4 teaspoon salt in a medium bowl.
Position rack in upper third of oven; preheat broiler.
Place the steak on a rimmed baking sheet (discard the marinade). Broil 3 to 4 minutes per side for medium. Transfer to a clean cutting board and let rest for 5 minutes. Thinly slice against the grain. Serve the steak wrapped in warm tortillas and topped with the salsa and cheese.

Nutrition

Per serving : 350 Calories; 14 g Fat; 4 g Sat; 6 g Mono; 76 mg Cholesterol; 28 g Carbohydrates; 29 g Protein; 6 g Fiber; 437 mg Sodium; 773 mg Potassium

Make Ahead Tip: Marinate the steak (Step 1) for up to 1 day. Prepare the salsa (Step 2) up to 2 hours ahead.

Posted in 500 Calories or less, Beef Dishes | 6 Comments

Homemade Flour Tortillas

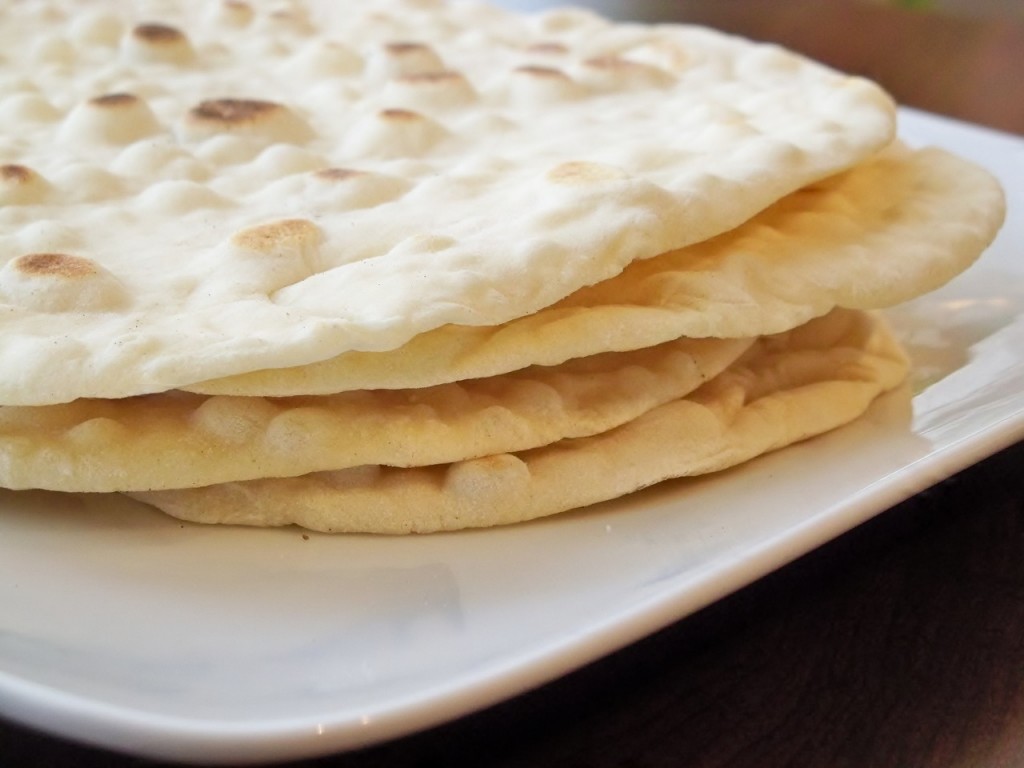
These amazing homemade tortillas are the first official item checked off my bucket list. I can’t BELIEVE it took me this long to make homemade tortillas. They are insanely easy to make and the taste? Absolutely awesome. I have been ruined for all other tortillas. I will say though, Lisa over at Homesick Texan said that if you can roll out pie dough you can roll out a tortilla. Reading that frightened me. I suck at rolling out pie dough! I’ll admit, my first tortilla looked like a seashell (check out the awesome cell phone pic on our facebook page!). I didn’t do it on purpose and probably couldn’t do it again if I tried but seashell or not, it tasted heavenly! The only thing I plan on doing differently next time is doubling or maybe even tripling the recipe because the rolling out part was pretty painless and if you are going to wait an hour for the dough to rise you may as well get a couple meals worth out of it! These freeze beautifully and only need to be warmed up in a dry pan.

Homemade Flour Tortillas

Ingredients:
Two cups of all-purpose flour (can make them whole wheat by substituting one cup of whole-wheat flour for white flour)
1 1/2 teaspoons of baking powder
1 teaspoon of salt
2 teaspoons of vegetable oil
3/4 cups of warm milk

Method:
Mix together the flour, baking powder, salt and oil.
Slowly add the warm milk.
Stir until a loose, sticky ball is formed.
Knead for two minutes on a floured surface. Dough should be firm and soft.
Place dough in a bowl and cover with a damp cloth or plastic wrap for 20 minutes.
After the dough has rested, break off eight sections, roll them into balls in your hands, place on a plate (make sure they aren’t touching) and then cover balls with damp cloth or plastic wrap for 10 minutes. (It’s very important to let the dough rest, otherwise it will be like elastic and won’t roll out to a proper thickness and shape.)
After dough has rested, one at a time place a dough ball on a floured surface, pat it out into a four-inch circle, and then roll with a rolling pin from the center until it’s thin and about eight inches in diameter. (If you roll out pie crusts you’ll have no problem with this.) Don’t over work the dough, or it’ll be stiff. Keep rolled-out tortillas covered until ready to cook.
In a dry iron skillet or comal heated on high, cook the tortilla about thirty seconds on each side. It should start to puff a bit when it’s done.
Keep cooked tortillas covered wrapped in a napkin until ready to eat.
Can be reheated in a dry iron skillet, over your gas-burner flame or in the oven wrapped in foil.
While you probably won’t have any leftovers, you can store in the fridge tightly wrapped in foil or plastic for a day or so.
Makes eight tortillas.

Posted in The Basics... | 7 Comments

Menu Plan: 2/12-2/18

It’s the week of Valentines Day and I’m certain many of you are planning special meals for Tuesday! We have a fun “healthy” meal planned for Tuesday and plan on splurging tonight on dinner with a fun indulgent dinner. What are you making for your Valentines dinner? Or are you going out to eat instead?


Sunday: Pan Seared Chicken with Sauce Chasseur, mascarpone mashed potatoes with chives and peas with caramelized onions and crispy bacon

Monday: Youvarlakia and cucumber, tomato and red onion salad

Tuesday: Happy Valentines Day! Tuscan Garlic Chicken

Wednesday: Super-Crisp Oven-Fried Fish and Quinoa Pilaf with Corn and Jalapenos

Thursday: Smothered Pork Chops with Thyme, curried cauliflower and leftover quinoa

Friday: Low-cal Fettuccine Alfredo, salad

Saturday: Off to a party with friends

Posted in Menu Plan Suggestions | 2 Comments

Cinnamon Sugar Biscotti with Coffee Glaze

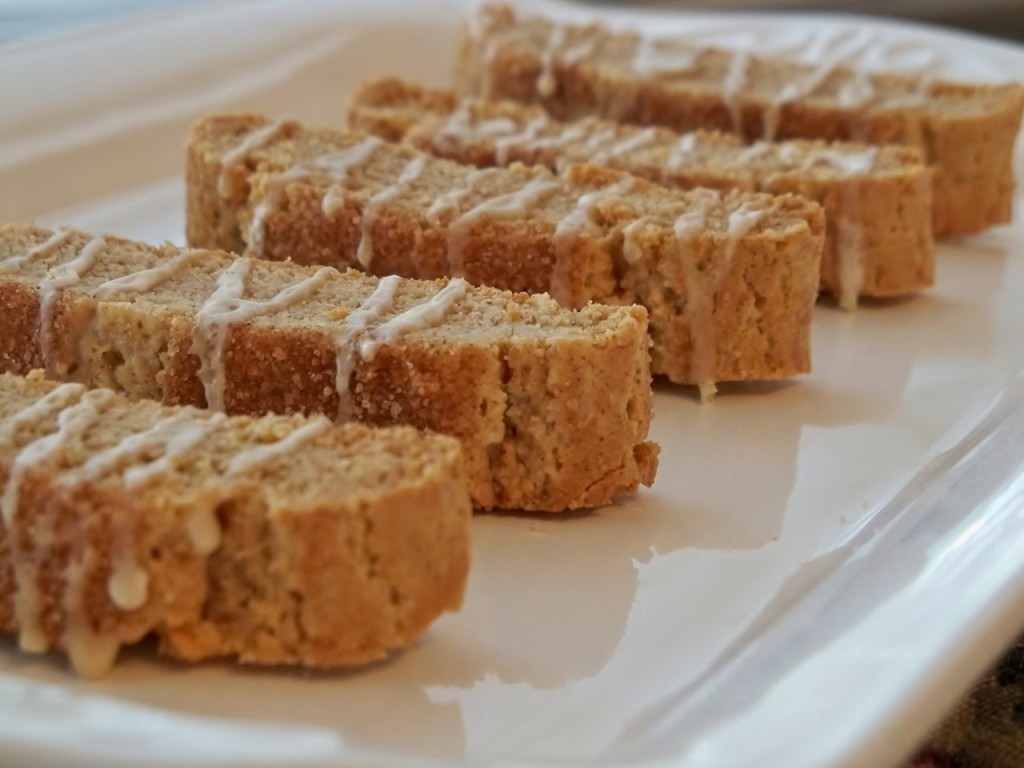
When you’re friends with me and you’re in my home there is a very good chance I’ll ask you to come play in the kitchen with me. This weekend, after I managed to bang my finger in a drawer (pretty hard I might add!) I decided I needed kitchen therapy. Mind you, I was reaching for a measuring cup to finish some homemade ice cream when I banged my finger but ice cream doesn’t count! My sweet friend Abby was coming by just long enough to show me some purchases from a shopping trip and it turned into a spontaneous time to bake (that actually happens… a lot). These certainly looked simple enough and after smelling biscotti baking all day in class I knew I had to make them. As if these weren’t sweet enough, I added a light drizzle of coffee glaze over the top that really finished the biscotti beautifully. Given my addiction to coffee (I can quit anytime I want!), these were a perfect treat to have all weekend, with each cup or lets be honest, pot of coffee. 🙂

These store really well, in fact I have 12 left in my freezer ready for the weekend! Give them a try, soon!

Cinnamon Sugar Biscotti
Adapted from: Annie’s Eats

Yield: about 20-24 cookies

Ingredients:
For the dough:
2 cups all-purpose flour
1½ tsp. ground cinnamon
1 tsp. baking powder
¼ tsp. salt
1 cup sugar
6 tbsp. unsalted butter, at room temperature
1 large egg plus 1 large egg yolk
1 tsp. vanilla extract

For the topping:
¼ cup sugar
1 tsp. ground cinnamon
1 large egg, lightly beaten

For the Coffee Glaze:
1 cup powdered sugar
2-3 tablespoons strong coffee, room temperature
1/4 teaspoon vanilla

Directions:
Preheat the oven to 325Ëš F. Line a baking sheet with parchment paper or a silicone baking mat. In a medium bowl, combine the flour, cinnamon, baking powder, and salt; whisk to blend and set aside. In the bowl of an electric mixer, cream together the butter and sugar on medium-high speed until lightly and fluffy, 3-4 minutes, scraping down the bowl as needed. Blend in the egg and then the egg yolk, beating well after each addition. Blend in the vanilla until incorporated. With the mixer on low speed, blend in the dry ingredients just until incorporated and a dough is formed.

Divide the dough into two halves. Shape each half into a log 9 inches long by 1½ inches wide on the prepared baking sheet, spacing the logs at least 3-4 inches apart. In a small bowl, combine the sugar and cinnamon for the topping and stir to blend well. Lightly brush the tops of the logs with the beaten egg, and sprinkle generously with some of the cinnamon sugar mixture.

Bake for 40-45 minutes, rotating halfway through baking, until the tops are golden brown and slightly firm to the touch. Remove the pan from the oven but maintain the oven temperature. Once the logs are cool enough to handle, slice on the diagonal into 1½-inch slices (about 10-12 per log). Place biscotti cut side-down on the baking sheet and sprinkle with more of the cinnamon sugar mixture. Bake an additional 10-15 minutes, until crisp and golden.

To make Coffee Glaze: Whisk coffee and vanilla into powdered sugar. Start with 2 tablespoons of coffee and gradually add more to desired consistency. Glaze should be slightly runny but thick like chocolate syrup.

When biscotti are cool, drizzle over coffee glaze. Allow glaze to harden and then store in airtight container.

Posted in Breakfast, Desserts | 6 Comments

DIY: Taco Seasoning

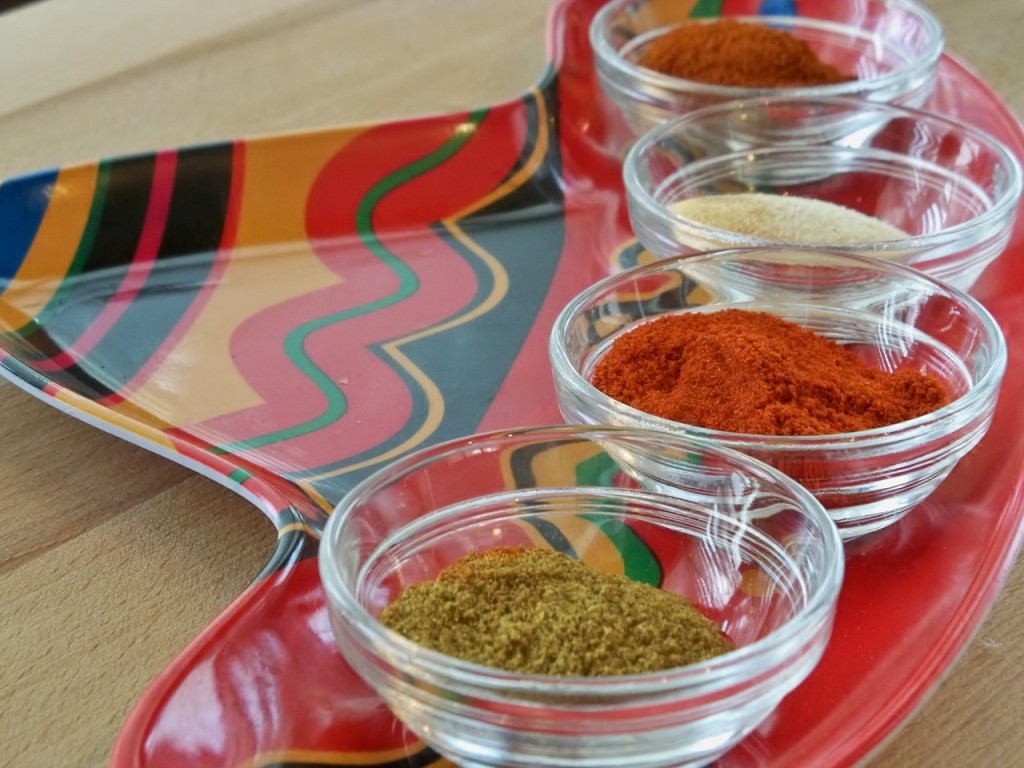
Trust me when I say, there is no reason to buy packets of taco seasoning at the store. Sure, they are convenient but they are loaded with sodium. Making this taco seasoning is the work of one or two minutes, at most, and makes enough for several meals. I found a great deal on jars at Ikea that I use for all of my homemade spice mixes.

Use this spice mix anywhere you would use a taco seasoning packet, just remember to add salt to your tastes because this spice mix doesn’t have salt in it.

Homemade Taco Seasoning

Ingredients:
4 tbsp. chili powder
3 tbsp. plus 1 tsp. paprika
3 tbsp. ground cumin
1 tbsp. plus 2 tsp. onion powder
1 tsp. garlic powder
¼ tsp. cayenne pepper

Directions:
Combine all ingredients in a bowl, and mix well to blend.  Store in an airtight container until ready to use.

To prepare taco meat, use 2 heaping tablespoons in place of a package of taco seasoning (cook approximately 1 lb. of beef or chicken, add 1 cup of water with the seasoning, and simmer until the liquid is almost completely gone.)

Posted in The Basics... | 1 Comment

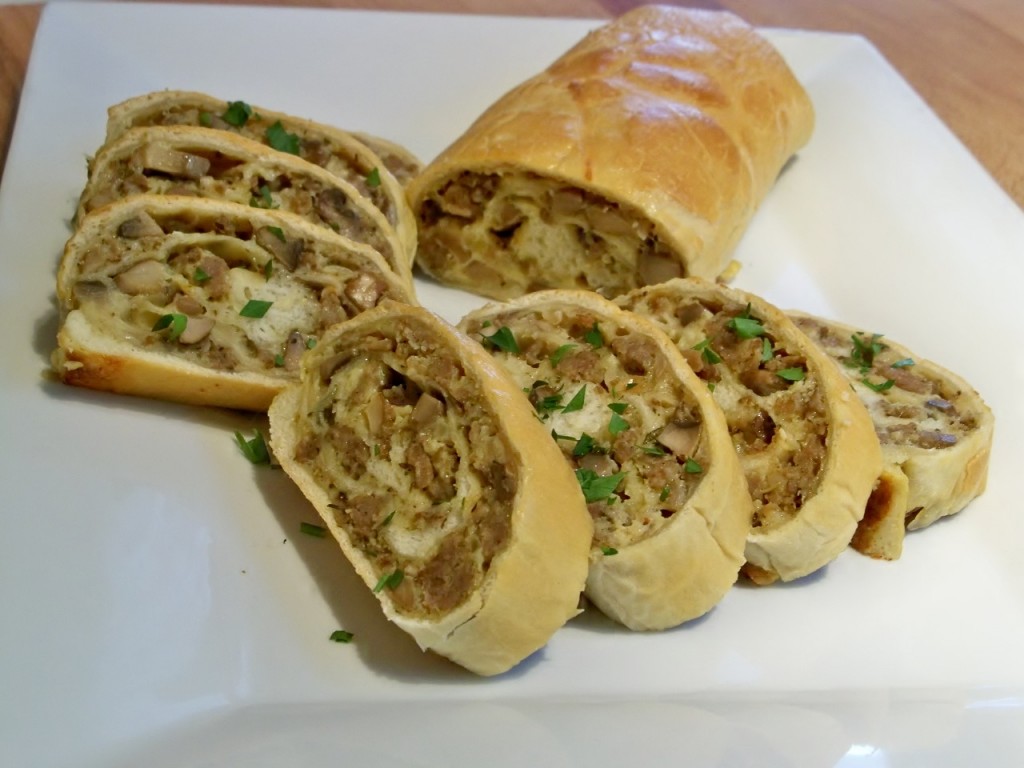
Breakfast Sausage Bread

I’m not too big into breakfast. Pancakes and waffles while delicious aren’t usually my bag (except for my husbands grandma-she makes AMAZING pancakes). Ordinarily for us, breakfast happens quickly because we get up at an ungodly hour Monday through Friday and if it doesn’t pour into a cereal bowl it isn’t happening.
Luckily I made this on a Sunday morning when I could take my time and eat at a decent time in the morning. We enjoyed this bread so much! Hubby and I both agreed that this will definitely be made again and I’m pretty sure it just got added to our Christmas morning breakfast menu.

The original recipe makes 2 huge loaves, so I cut the recipe in half. I’ve reflected the changes below.

Breakfast Sausage Bread
Adapted from here

Ingredients

1 (1 pound) loaf frozen white bread dough, thawed
1/2 pound mild pork sausage
3/4 cup diced fresh mushrooms
1/4 cup chopped onion
2 eggs
1 1/4 cups shredded mozzarella cheese
1/2 teaspoon dried basil
1/2 teaspoon dried parsley flakes
1/2 teaspoon dried rosemary, crushed
1/2 teaspoon garlic powder
1/4 teaspoon crushed red pepper flakes

Directions

Allow dough to rise until nearly doubled.
Meanwhile, in a skillet over medium heat, cook and crumble sausage. Add mushrooms and onion. Cook and stir until the sausage is browned and vegetables are tender; drain. Cool. Beat 1 egg, set aside. To sausage mixture, add 1 egg, cheese and seasonings; mix well. Roll loaf of dough into a 16-in. x 12-in. rectangle. Spread the sausage mixture on each loaf to within 1 in. of edges. Roll up jelly-roll style, starting at a narrow end; seal edges. Place on a greased baking sheet. Bake at 350 degrees F for 25 minutes; brush with beaten egg. Bake 5-10 minutes more or until golden brown. Serve warm.

Posted in Breakfast, Food for the Holidays! | 4 Comments