Menu Plan: 2/5-2/11

To say this week will be busy is a massive understatement. Who cares though, because it’s mostly fun things. Let’s not waste any time shall we? Here’s our menu for the week. 🙂

Sunday: Super Bowl Party! We’re having Garlic Buffalo Chicken Wings, curly fries, pretzels with cheese sauce, taco cheesecake (you heard me!) and cupcakes.

Monday: I am teaching a cooking class so dinner will be early. Carne Asada Tacos (with fresh tortillas – hello bucket list).

Tuesday: A friend is doing us a giant favor so we are making the family Salted Steak with garlic herb butter, baked potatoes and salad.

Wednesday:
Sichuan Style Chicken with Peanuts with snow peas and brown rice.

Thursday:
Skinny Chicken Tikki Masala and leftover brown rice.

Friday: Shakshura and lavash flatbread

Saturday: Out with my sister! The kitchen is closed. 🙂

Posted in Menu Plan Suggestions | 1 Comment

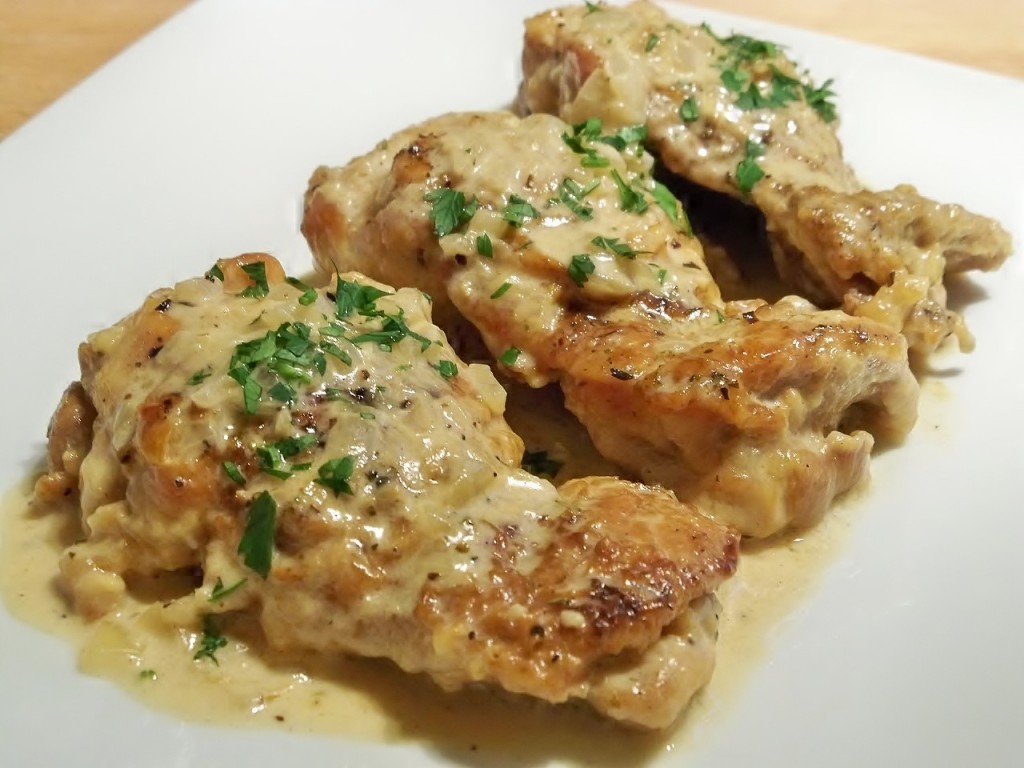
Chicken Fricassee

I get pretty excited for the weekends. We are pretty strict about our diet during the week and try and watch our calories closely. Let’s be honest though. I mean really really honest. Sometimes you just need some heavy cream and butter. I’m okay with that. My problem previous to this diet was that I “needed” heavy cream and butter 4 times a week. No wonder I got fat. You could probably lighten this dish up quite a bit with a few changes but I chose not to. This is one of my favorite chicken dishes and I really wanted the velvety finish that heavy cream gives to the sauce. So we ate this dish on a Saturday night, heavy cream, butter and all and then I promptly destroyed my husband in a game of Just Dance on Wii. I’m pretty sure the 4 times we danced to “You can’t touch this” worked off all the calories. If that’s what it takes people, I’d dance all night!

I delivered a pan of this to my hairdresser who just had a baby and I received immediate reports that both her husband and toddler licked the plate clean. I think they liked it too. 😉

Try this chicken for yourself! Then dance to MC Hammer and just like that, all will be right in your world.

This dish is made with boneless skinless chicken thighs. My husband doesn’t care for dark meat but he absolutely agrees that dark meat works best here. If you must have chicken breasts, make sure they are thin and adjust your cooking times as necessary.

Chicken Fricassee
Serves 4-6

2 – 2 1/2 lbs Boneless Skinless Chicken Thighs
Kosher Salt and Pepper
1/2 cup of flour, to dust chicken
4 Tablespoons butter (divided)
1/4 cup vegetable oil
2 large shallots, diced (1/2 of a large onion would work here too)
3 cloves of garlic, minced
4 fl. oz white wine
2 cups chicken stock
4 fl. oz heavy cream
1 Bay Leaf
1/2 teaspoon Italian Seasoning

Directions:

Trim off any excess fat from chicken thighs. Sprinkle both sides of each thigh with salt and pepper. Lightly dust with flour (this should be a light coating. I like to pat the flour on and then clap it in my hands to make sure it’s evenly and lightly coated).
Preheat a large skillet with 2 tablespoons of butter and oil over medium heat. Working in batches brown chicken thighs on both sides. It should take about 2-3 minutes per side, more or less depending on your stove. You are only looking for color on the skin, not completely cooking the chicken. Remove thighs to a plate while finishing batches.
Remove oil from pan and carefully wipe out with a paper towel to get out any extra pieces off the bottom of the pan. Heat remaining 2 tablespoons of butter in pan, and add shallots and garlic. Saute over medium heat being careful not to burn the garlic until shallots soften. Add white wine and chicken stock, Italian seasoning and bay leaf. Add chicken thighs and juice from plate into pan. Nestle all the thighs in so that they are mostly flat. Bring to a simmer. Cover and let simmer for 15 minutes. Check for seasonings after 10 minutes. If you are using a base or bouillon for your chicken stock be careful how much salt you add! It will reduce further and the saltiness will intensify. Add cream to pan. Using tongs make sure chicken is well coated with sauce. Allow to simmer with lid off for 5-10 minutes more while sauce reduces. Adjust seasonings. Serve immediately.

Posted in Chicken Dishes, Quick and Easy Recipes | 7 Comments

My Foodie Bucket List

I’m not much into New Years Resolutions but I can make lists like a mad woman. I’m also a huge believer of setting goals. I’ve set the bar pretty high in my opinion for several items on my Foodie Bucket List this year. Some (like the Rose Cake) make me incredible nervous but I absolutely love a challenge. I can’t wait to start scratching things off the list! If I know me though, I’ll probably add something every time I cross something off. 🙂 Are any of these on your foodie bucket list? Have you already made any of the things on my list? I’d love to hear any tips, pointers or recipes that you love!

My Bucket list for 2012, in no particular order:

Macarons

Rose Cake (I want to make this for my birthday!)

Homemade Flour Tortillas

Sushi (I’ve made it in class, time to duplicate it at home!)

Fresh Caramels

Homemade Ravioli

Braided Bread

Candied Bacon

Pierogi

Popovers

Focaccia Bread

Braised Short Ribs

Homemade Bar B Que Sauce

Homemade Pickles

Homemade Marshmallows

Carve a Watermelon

That’s all for now! Looks like I’ve got plenty of work to do. 🙂

Posted in General Announcements | 9 Comments

Corn and Cilantro Fritters

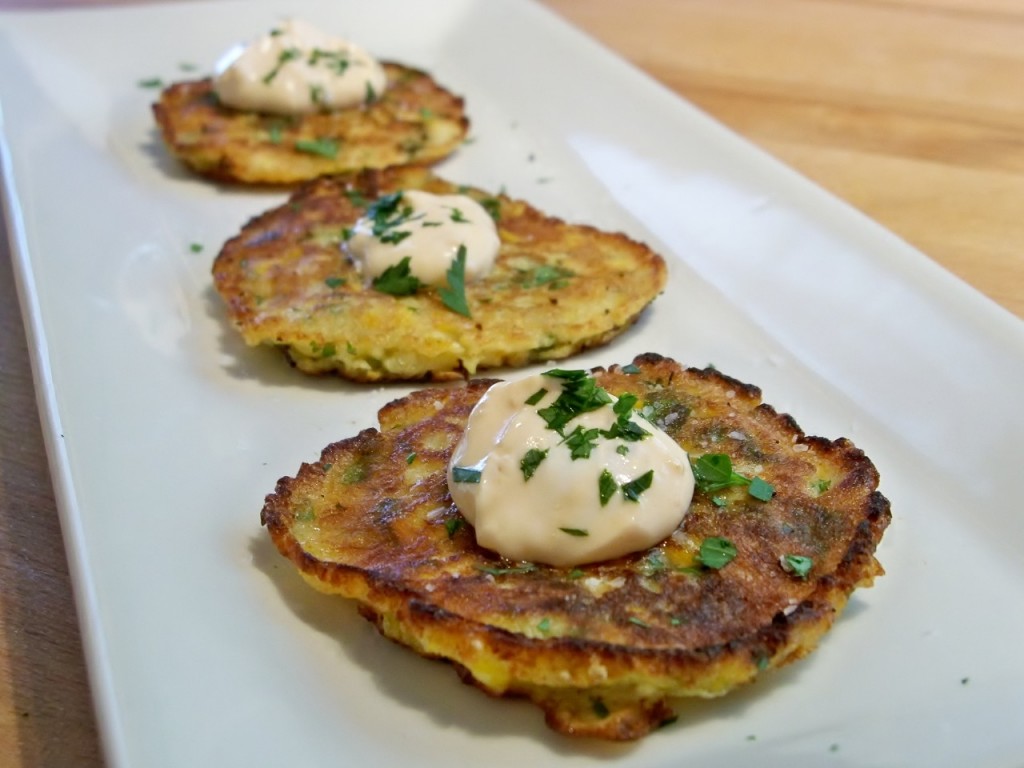
I knew as soon as I saw these little babies on pinterest that I would be making them as soon as possible. These were just as delicious as they sound. They were crunchy and sweet from the corn and had a super fresh taste thanks to the cilantro and ginger. I made my fritters small and thin and skipped the step of finishing them in the oven. I received a cast iron skillet for Christmas and it was the perfect pan to fry these up in. I topped mine with a mixture of sour cream, sriracha (the best hot sauce ever!) and garlic which was the perfect finish to the crunchy corn fritter. These are best eaten straight out of the pan. Just put them on a paper towel lined plate to absorb any excess oil, allow them to cool a minute or two and eat to your hearts content!

Enjoy!
Corn and Cilantro Fritters
Adapted from: Mangiare

1 15 oz can of corn (reserve liquid from can – see below)

2 green onions finely chopped (green and white parts)

½ onion finely diced

1 tablespoon ground fresh ginger

1 teaspoon olive oil

1/3 bunch of cilantro leaves chopped

1 small sweet pepper diced (or about 1/4 of a regular bell pepper)

1 tsp dried cumin

1/2 cup of reserved liquid from can of corn (or water if you are using fresh corn)

2 eggs

1 cup self raising flour

Kosher Salt

Cracked black pepper

canola or vegetable oil for frying (about 1/2 cup)

Chopped Cilantro for garnish

Sriracha Sour Cream (see recipe below)

Directions:

In a small pan with 1 teaspoon of olive oil – Sauté the onion and ginger in a little oil until soft and translucent.

Place the flour, 1 cup of the corn kernels, onion, ginger, cumin, water and eggs into a food processor and process until well combined.

Place mixture into a large mixing bowl and stir in the remaining corn, green onions, pepper, and cilantro and season the mixture with sea salt and black pepper.

In a small non-stick fry pan (or cast iron skillet) add oil and set over medium to medium high heat.

Using a (1 oz) ladle (if you don’t have a 1 oz ladle, just measure out 2 tablespoons per fritter) fry fritters 2 at a time, approx 1 to 2 minutes per side or until golden. When you ladle the batter into the oil spread the batter out thin like a pancake, so that the inside of the fritter cooks evenly. Once Fritter is golden and crispy, move to a paper towel lined plate to remove excess oil. Sprinkle the fritters with kosher salt while they are still warm from the pan. Top with a dollop of Sriracha sour cream and chopped cilantro (see recipe below). Serve immediately.

Sriracha Sour Cream

1/2 cup sour cream
1 tablespoon sriracha or any other chile garlic hot sauce
1 clove of garlic, minced
salt and pepper to taste

In a small bowl combine all ingredients and season to taste with salt and pepper.

Posted in Appetizers, Vegetarian Dishes | 3 Comments

Menu Plan: 1/29-2/4

Can you believe it’s almost February!? My dad was right. The older you get the faster time flies. This past week was a great week for us. My hubby is down 2 more lbs, with a total weight loss of 31 lbs (he gained a pound or two at Christmas…) and I’m down 1.8 lbs with a total weight lost of 24 lbs. I’m so thankful that we are losing weight. We both feel better and have so much more energy! I’m looking forward to trying some new recipes this week! 🙂
Also this Sunday is our monthly (or sort of monthly…) Thai Food Sunday! It’s usually on a Friday but I’m just happy to be having one. I can’t wait to get together with my friends and eat delicious Thai Food. See our menu below!

Sunday: Thai Food Sunday! Here’s our Menu:

Shrimp Summer Rolls

Chicken Satay with Spicy Peanut Sauce

Steamed Edamame

Curry 3 ways: Chu Chee, Prik Khing, and Kaeng Kua

Jasmine Rice

Thai Sweet coconut Cupcakes with Caramel Topping

Assorted Beverages

Monday:  Lightened up Beef Stroganoff over egg noodles and salad

Tuesday: Orange and Rosemary Pork Tenderloin, Roasted Potatoes and Brussels Sprouts

Wednesday: Lightened up Lasagna Soup, Salad

Thursday: Pan Roasted Garlic and Herb Chicken with Chopped Salad and Creamy Caper Dressing and brown rice

Friday: Mexican Shrimp Burgers, sweet potato fries 

Saturday: I’ll be out of town and coming in late, so pizza it is! 🙂

Posted in Menu Plan Suggestions | 5 Comments

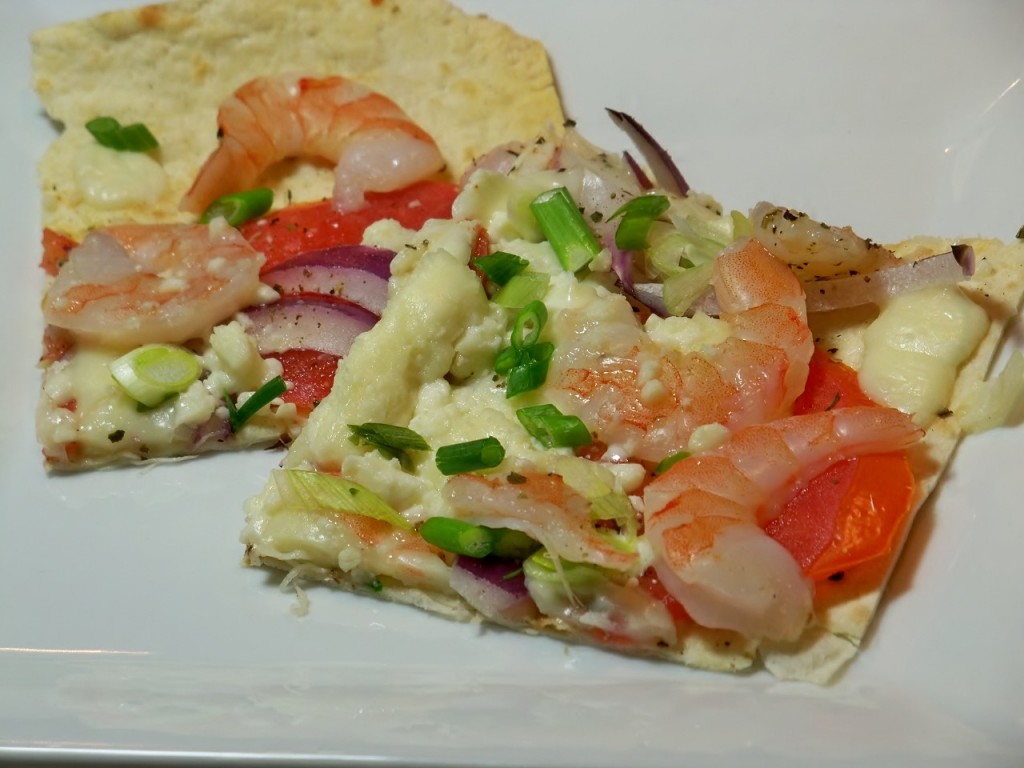
Shrimp and Feta Lavash Flat-Bread Pizza

When you are a fattie (such as myself) looking to lose weight you can feel like you’re missing out on the delicious food like pizza. I stumbled on lavash flat-bread at a Middle Eastern market in Orlando. I felt like I was in heaven. Beautiful spices and sauces everywhere and in the very corner in the refrigerated section were these lovely flat-bread. They are SO tasty. We use lavash for dipping with hummus and other delicious spreads and most recently we started making it in to flat-bread pizzas. No more feeling sorry for myself. 🙂 Thanks to the wafer thin lavash this bakes up with a crunchy thin crust texture and it is loaded with flavor thanks to the feta, red onion and tomato.

Find Lavash (or any thin flat-bread) and then makes this post-haste!

🙂

Shrimp and Feta Lavash Flat-bread Pizza

1 large sheet of Lavash (I had to cut mine to fit a 15 x 10 inch baking sheet)
1 tablespoon olive oil
1 large tomato, sliced thinly
1/4 of a small red onion sliced vertically (thin!)
1/2 tsp kosher salt
cracked black pepper to taste
1 teaspoon Italian Seasoning
6 oz. feta cheese
1/2 lb shrimp, peeled and deveined
1/4 cup green onions, chopped for garnish (optional)

Directions:
Preheat oven to 425
Cut shrimp in half down the center of the shrimp, as if you were butterflying the shrimp but all the way though. This will give you two thin flat pieces of shrimp that will cook very quickly. Set aside.
Trim lavash bread to fit baking sheet (or lay whatever size fla-tbread you could find on the baking sheet)
Brush lavash with olive oil
Bake for 2-3 minutes until it begins to get crisp
Remove from oven
Spread tomato slices over lavash to form a thin layer
Spread red onion slices over tomatoes
Sprinkle over salt, pepper and Italian Seasoning
Crumble Feta over seasonings and top with shrimp halves, make sure to make a single layer of shrimp so they cook quickly and evenly.
Bake for 5-7 minutes until flat bread is crispy and shrimp is pink. Garnish with green onions.
Cut with a knife or pizza cutter and serve immediately.

Posted in Quick and Easy Recipes, Seafood Dishes | 2 Comments

Tips & Tricks: Freezing Bacon

While I would love to eat a whole package of bacon a week, my thighs would prefer I not. I adore bacon and use it pretty frequently in recipes but typically I only use one or two slices at a time. I found I was wasting quite a bit of bacon keeping it in my fridge and only using it one slice at a time. So then I decided to just start freezing it. The only problem with freezing bacon straight from the store is you get a gigantic block of frozen bacon which you have to completely defrost to get your one piece. I decided to start treating my bacon like the bulk suppliers do for restaurants. IQF (Individual Quick Frozen) is the best way I’ve found to get the exact amount of bacon I need. Freezing it this way keeps it tasting as fresh as possible and it enables me to stock up when it’s on sale. Once it’s frozen you can store it with the rest of the individual frozen bacon and grab one piece at a time. The procedure couldn’t be simpler. Check out the steps below!

P.S. Cutting frozen bacon is far easier than defrosted bacon so when you are using it for a recipe, cut it straight from the freezer!

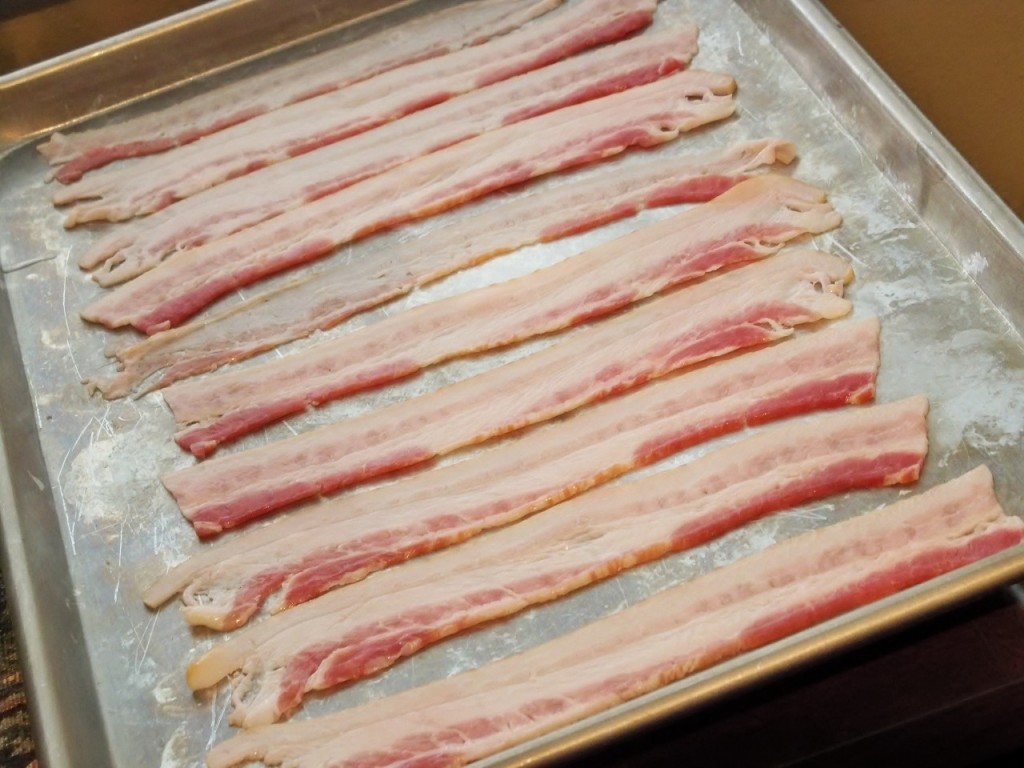
Please note: My lovely, abused but still sturdy baking sheet.


Freezing Bacon

1. Lay out bacon on a baking sheet, making sure that no pieces are touching.

2. Lay baking sheet in freezer flat. (In my freezer I can stack two sheets on top of each other with something like a bag of frozen veggies on either side of the bottom pan to give room for circulation on the bottom sheet). The bacon should be uncovered

3. Freeze 12 hours or overnight.

4. Only remove one pan from the freezer at a time to package for freezing. The bacon will defrost quickly so you will need to move quickly. Using a metal spatula gently lift bacon off the baking sheet and put them in a freezer safe bag. Once all bacon is off the pan, immediately place freezer bag of bacon in freezer.

5. It’s now ready to use whenever you are!

This will last 1-2 months in the freezer.

Posted in Tips In The Kitchen... | 1 Comment