Menu Plan: 1/15-1/21

Hallelujah! I made it through my first week of classes and survived. This week I am making a few old favorites and trying some new dishes (as usual). I didn’t get to make my beloved Chicken Shawarma last week because my store was out of the low-calorie flax-seed pita that we use to make it. So that will definitely be rolling over to this week. I can’t wait to see what this week brings!

Sunday: Dinner with Family

Monday: Chicken Shawarma

Tuesday: Herb Topped Pork Tenderloin Casserole

Wednesday: Lavash flatbread “pizza” with shrimp, red onion and feta, salad

Thursday: Chicken Satay with spicy peanut sauce and edamame

Friday: Athenian Orzo

Saturday: Chicken Fricassee, mashed potatoes and roasted green vegetable (whatever looks good at the produce market)

Posted in Menu Plan Suggestions | Comments Off on Menu Plan: 1/15-1/21

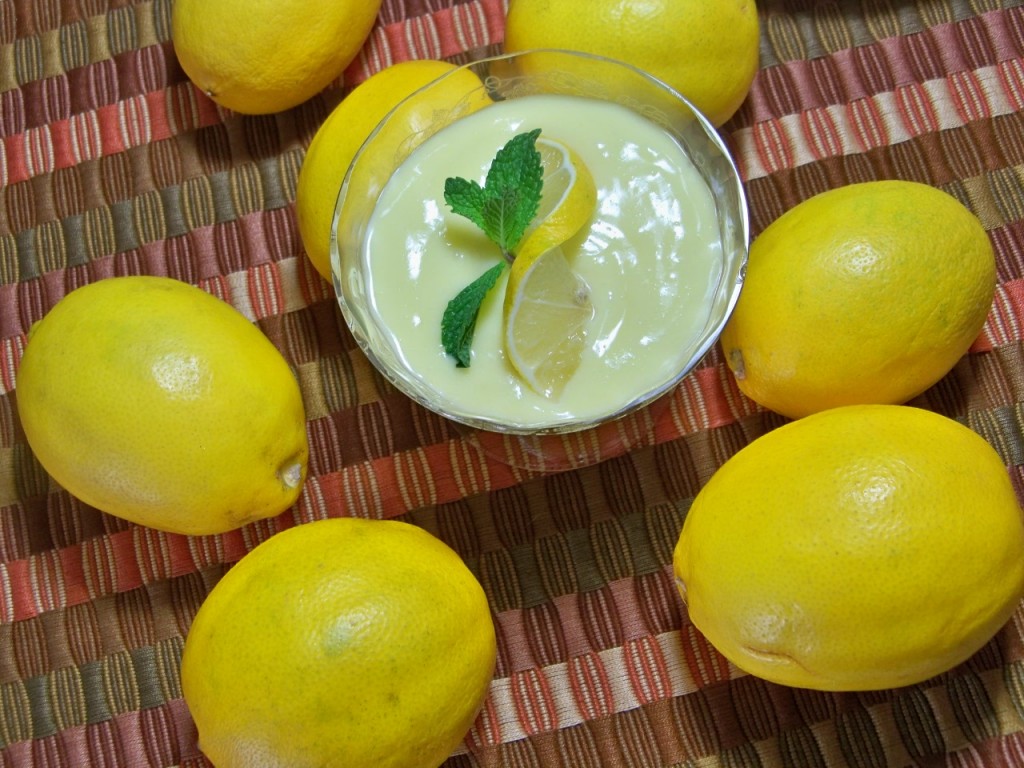
Meyer Lemon Curd

What I’m about to say is disturbing but true.
I would bathe in this stuff if I could.
It is amazing and refreshing, tart and sweet, creamy and light. It’s perfect for scones, which is what we used it for. You could serve it with biscuits or use it as a filling for cakes. You could technically just eat by the spoonful out of the jar but I’m not going to encourage such behavior in the month of January when everyone is trying to be good. 😉
What makes this even more special is that this curd is made with Meyer lemons. Meyer lemons are somewhat sweeter than regular lemons and less acidic. They are actually a hybrid of lemon and orange. I have to say that if you think you can’t find Meyer lemons around you, you may be wrong. While meandering through Wal-Mart (groan) I found a 2 pound bag of Meyer lemons in the produce section. Lucky for me though, my friend has a huge Meyer lemon tree and I was able to partake in some of her bounty.
It was a good day.

You really should make this.

Enjoy!

Meyer Lemon Curd
Source: Confections of A Foodie Bride

Ingredients

1/2 cup Meyer lemon juice (This was 2 lemons for me, but mine were large. You may need up to 4)
1 Tbsp lemon zest
2 large eggs
1/3 cup sugar
1 stick butter, cut into 4 pieces

Instructions

Whisk the zest, juice, sugar, and eggs in a bowl set over a saucepan of simmering water. Add butter and whisk constantly, until thickened and smooth (a thermometer should read 160-170F).
Strain curd through a fine sieve set over another bowl. Serve warm or cover surface of curd with plastic wrap and cool completely.
Curd will keep over a week in the fridge in a jar.

Notes

Yields: ~1 1/2 cups

Posted in Breakfast, The Basics... | 4 Comments

Cheddar Scallion Biscuits

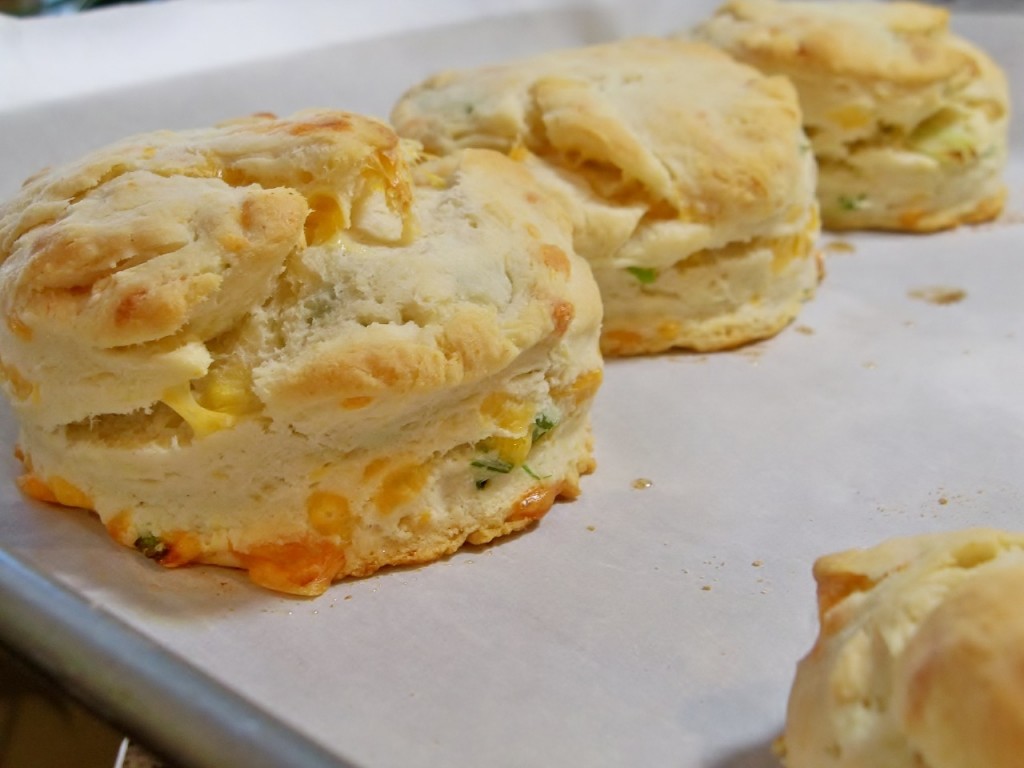
It seems fitting. My last semester of culinary school starts this week and I (perhaps not humbly so) think I have finally mastered making an amazing biscuit! It doesn’t surprise me that I found this recipe on Smitten Kitchen. Can she do any wrong? I was really craving a flaky, buttery biscuit and pinterest lead me straight to this recipe. I added fresh shredded cheddar and fresh scallions to my biscuits and they went perfectly with some sausage gravy I whipped up on Saturday morning (What? It was a cheat day!). Either way, I am in love with these biscuits. For the record, I was in love with the biscuits before I slathered them in sausage gravy, but that didn’t hurt either. 😉

These are without a doubt, a must try!

Cheddar Scallion Biscuits
Adapted from: Smitten Kitchen
Makes about 10 biscuits

3 tablespoons melted butter
2 cups all-purpose flour, plus more for dusting the surface
1 tablespoon baking powder
1/2 teaspoon salt
1 1/2 cups heavy cream
2 scallions finely sliced (greens and white parts)
8 oz shredded sharp cheddar cheese

Preheat the oven to 425°F. Line a baking sheet with parchment paper. Melt butter in a small pot or microwave dish, and set aside. Sift two cups flour, the baking powder and salt into a large bowl. Add scallions and cheddar cheese. Fold in 1 1/4 cups cream. If the dough is not soft or easily handled, fold in the remaining 1/4 cup cream, little by little. I ended up using two additional tablespoons, or half the unused cream.

Turn dough onto a floured surface, mound it into a ball and, using your hands, press it to a thickness of about 3/4 inch. Cut into rounds, 2 1/2 inches in diameter. Gather dough scraps and continue to make rounds. Brush each round with melted butter and arrange on the baking sheet. Bake until golden, 12 to 15 minutes. Serve immediately, or flash freeze for future use. [Biscuits can be baked straight from the freezer, and additional few minutes baking time will be needed, usually around 3 to 5.]

Posted in Breakfast, Side Dishes, The Basics... | 2 Comments

Pumpkin Mousse Parfaits

Did you know that if you eat this dessert you will become smarter? OK, that’s a slight exaggeration but pumpkin is loaded with Omega 3 oils that are crazy good for your brain. Which means over Christmas my IQ must have gone through the roof. 😉 I am loving the idea of individual desserts right now. Maybe it’s because we’ve been on a diet for a while now and having built in portion control is perfect for us. I’ve also been on a pumpkin kick lately. So add some whipped cream and some ginger snaps and I am one happy woman. I served these after dinner on Christmas day but made them on Christmas Eve morning. It was so nice to have them done and out of the way taking up relatively little precious space in my refrigerator. If you are needing a little more brain food and are craving a delicious dessert give these parfaits a try!

Enjoy!


Pumpkin Mousse Parfaits
Ingredients

1/4 cup dark rum
1 packet (2 teaspoons) unflavored gelatin powder
1 (15-ounce can) pumpkin (not pie filling)
1/2 cup granulated sugar
1/2 cup light brown sugar, lightly packed
2 extra-large egg yolks
2 teaspoons grated orange zest
1/2 teaspoon ground cinnamon
1/4 teaspoon ground nutmeg
1/2 teaspoon kosher salt
1 1/2 cups cold heavy cream
1 1/2 teaspoons pure vanilla extract
Sweetened whipped cream
8 to 10 chopped ginger cookies

Directions

Place the rum in a heat-proof bowl and sprinkle the gelatin over it. Set aside for 10 minutes for the gelatin to soften.

In a large bowl, whisk together the pumpkin, granulated sugar, brown sugar, egg yolks, orange zest, cinnamon, nutmeg, and salt. Set the bowl of gelatin over a pan of simmering water and cook until the gelatin is clear. Immediately whisk the hot gelatin mixture into the pumpkin mixture. In the bowl of an electric mixer fitted with a whisk attachment, whip the heavy cream and vanilla until soft peaks form. Fold the whipped cream into the pumpkin mixture.

To assemble, spoon some of the pumpkin mixture into parfait glasses, add a layer of whipped cream, then some chopped cookies. Repeat, ending with a third layer of pumpkin. Cover with plastic wrap and refrigerate for 4 hours or overnight. To serve, decorate with whipped cream and ginger snap cookies (top with cookies right before serving).

Posted in Desserts, Food for the Holidays! | 4 Comments

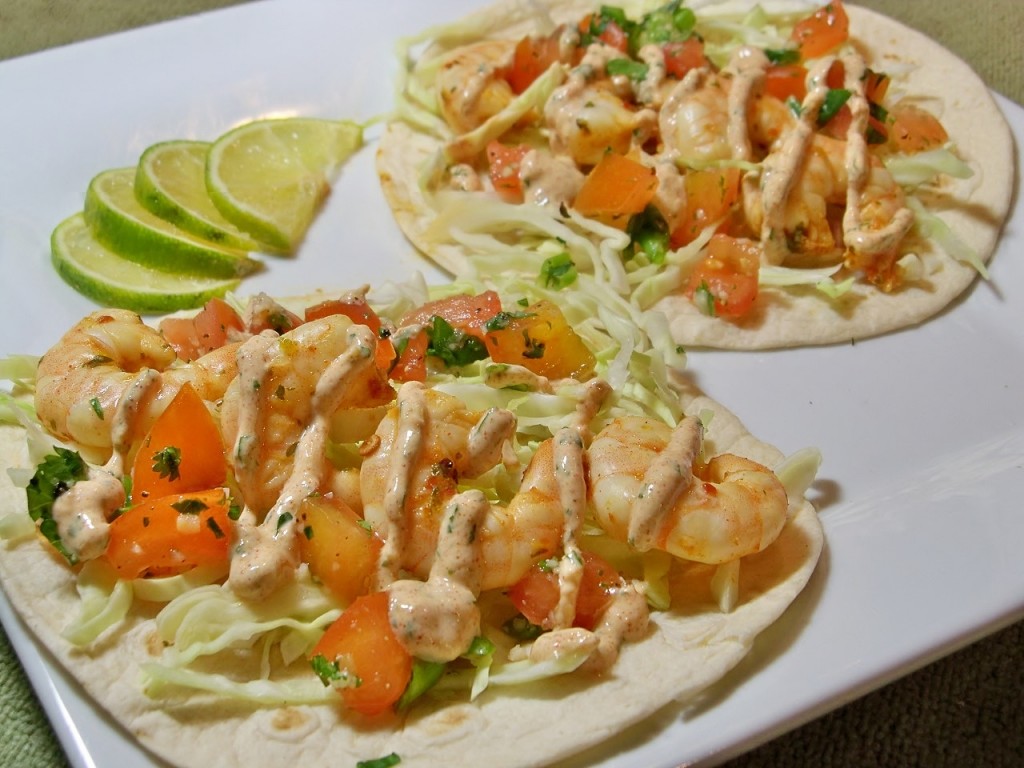
Spicy Citrus Shrimp Tacos with Southwestern Cream Sauce

Good night. That’s a mouthful. More importantly, it’s a delicious mouthful. I’m really digging all things that can be eaten with your hands lately. First it was the lettuce wraps, then the chicken shawarma and now these. I knew right away that these would definitely be on my must make list. First of all, I’m always looking for a new shrimp recipe and secondly finding a recipe that highlights chipotles in adobo is a must try. If you haven’t heard of chipotles in adobo, allow me to introduce you. They are smoked jalapenos that are in a thick sauce of tomato, paprika, garlic, vinegar and other spices. At first glance, a small can of chipotle in adobo for 2 dollars at the grocery store may seem a little pricey. Think again! They pack about 9 jalapenos in one can and they are loaded with flavor. I’ve never used more than 2 in a recipe. Which means that 2 dollars stretch over 4 or 5 meals. Just store them in an airtight container in the fridge, they will last for a while. They are pretty spicy so use caution when adding them. 🙂 Don’t worry though, it’s a good burn.

We were really overwhelmed at how great these turned out. They were refreshing and the crunch from the shredded cabbage was just perfect. They come in at 350 calories for 2 tacos, so my waistline and my taste-buds were both happy. (wheee!)

Enjoy!
Spicy Citrus Shrimp Tacos with Southwestern Cream Sauce
Barely adapted from: Prevention RD and Pink Parsley

juice of 1 orange (and 1 teaspoon of the orange zest)
juice of 1 lemon (and 1 teaspoon of the lemon zest)
juice of 1 lime
2 chipotle chile sen adobo
1 tsp adobo liquid
2 Tbsp canola or olive oil
1 tsp honey
1 tsp ground cumin
1 tsp chili powder
1 jalapeno, ribs and seeds removed, roughly chopped
3 cloves garlic
2 tablespoons chopped cilantro
salt and pepper
1 lb shrimp, peeled and deveined
1 cup cabbage, shredded ( SO GOOD!)
1 tomato, chopped
8 small (6-inch) corn or flour tortillas
1/2 lime, cut into wedges or slices

Southwest Cream Sauce

1/2 cup fat-free Greek yogurt (or sour cream)
1 garlic clove, minced
1 tsp chili powder
1/2 tsp cumin
1/4 tsp cayenne pepper* (Start with an 1/8 tsp if you are super sensitive to heat)
1/4 tsp salt
juice of 1 lime
2 Tbsp fresh cilantro, chopped

Directions:

Prepare grill or Preheat Broiler

In the bowl of a food processor, combine all the ingredients for the marinade, through the salt and pepper, and process until smooth and well combined. Pour over shrimp in a medium bowl, cover, and refrigerate for at least 10 minutes, but no longer than 30.

Meanwhile, whisk together all the ingredients for the southwest cream sauce.

Thread the shrimp onto skewers, and grill 1-3 minutes per side, until opaque and cooked through. Use the grill to heat the tortillas as well. If you don’t have access to a grill, broil shrimp 1-2 minutes per side, turning skewers as soon as shrimp turn pink.

Remove tails from shrimp, and divide among tortillas. Top with shredded cabbage, chopped tomato and cream sauce, with lime wedges. Serves 4 (2 tacos, each with 2 ounces of shrimp and 1 Tbsp cream sauce).

Nutrition Information (per serving): 347 calories; 10.5 g. fat; 150 mg. cholesterol; 502 mg. sodium; 36.3 g. carbohydrate; 4 g. fiber; 30.3 g. protein


Posted in 500 Calories or less, Seafood Dishes | 7 Comments

Menu Plan: 1/8-1/14

Watch out world! I am a woman on a mission this year. I’ve been cooking up a storm since before Christmas and have so many great recipes to share with you. This week I start my last semester of Culinary School! I am SO EXCITED! I think I can handle whatever this semester brings. I’ve got some delicious and healthy meals planned this week. Well except for the deep dish pizza and I am in no way sorry about that. 🙂 What’s on your menu this week?


Sunday: Orechiette with Sausage, Beans and Mascarpone

Monday: I’m teaching a private cooking class so dinner will be cooked early and easy! Poached Eggs in Tomato Sauce with Chickpeas and Feta with low calorie pita

Tuesday:
Chicken Shawarma, YAY!

Wednesday: First day of Class! Quick Chicken-Corn Chowder

Thursday: Baked Chicken Parmesan, whole wheat linguine and roasted broccoli.

Friday: Chicken Picatta and leftover whole wheat linguine

Saturday: Deep Dish Pizza!

Posted in Menu Plan Suggestions | Comments Off on Menu Plan: 1/8-1/14

Caprese Salad

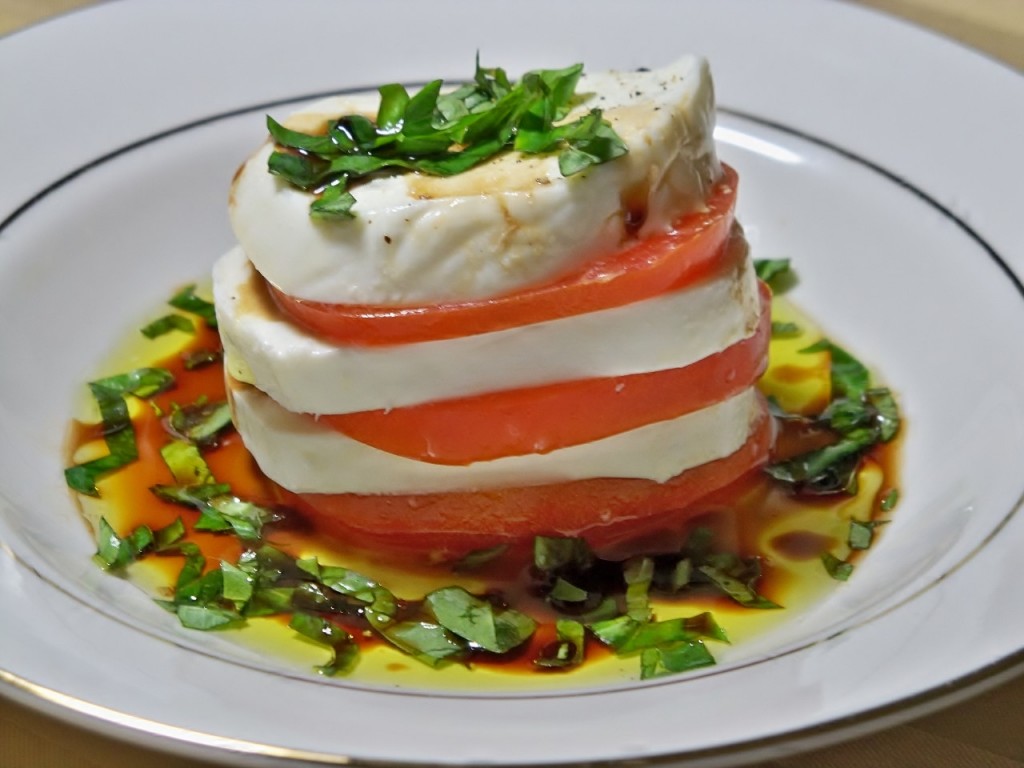
How could you not love Caprese Salad? The combination of a perfectly ripe tomato, fresh basil and soft mozzarella is to die for. Top it off with some tasty extra virgin olive oil and sweet, tangy balsamic vinegar and the taste goes through the roof. This salad served as the perfect starter for our Christmas Eve dinner. You certainly don’t have to wait until the holidays to make it though. As long as your tomatoes are ripe and flavorful, go for it! You can compose the salads about an hour before hand and then dress them right before serving.

I just need to say, this is a salad with equal parts cheese to vegetable. You can’t go wrong.

Enjoy!

Caprese Salad
Listed below are ingredients for 1, it is easily adjustable to however many you need!

3 thick slices of tomato
3 thick slices of mozzarella
1 tablespoon basil chopped
1 tablespoon Extra Virgin Olive Oil
2 teaspoons Balsamic Vinegar
Salt and pepper to taste

For Assembly:
Lay slice of tomato down first on your plate, then alternate mozzarella and tomato as shown in the photo above. Your last layer should be mozzarella. Drizzle with olive oil and balsamic vinegar. Top with chopped basil. Top each salad with kosher salt and cracked black pepper to taste. Serve immediately.

Posted in Salads, Vegetarian Dishes | 2 Comments